Homelab from scratch, part 3: Tailscale and a reverse proxy — the whole homelab from anywhere, without opening ports
Tailscale (a WireGuard VPN) as a subnet router with AdGuard DNS, plus Nginx Proxy Manager as a reverse proxy. Access to your whole home network from anywhere, ad blocking away from home and pretty names instead of ports — all without exposing anything to the internet.
Czytaj po polskuIn part 1 we set up Ubuntu Server (192.168.0.200), in part 2 AdGuard Home for the whole house. Everything works great — at home. Away from home, Portainer and AdGuard are unreachable, and the ads come back, because the phone is now asking a different DNS.
Part 3 is here. Today we’ll make sure we have access to our network from anywhere in the world and keep cutting unwanted traffic — even while sipping a drink in sunny Spain. But seriously: AdGuard is just the cherry on top. Once we have access to the whole network — the router, the services, anything we host — why not use it?
You could open ports on the router and expose the services to the internet. Don’t. Every open port is an invitation: within minutes bots, scans and login attempts start knocking. The blue-team rule is simple — we don’t expose anything to the world that we don’t have to.
Instead we’ll do two things:
- Tailscale — a private, encrypted tunnel (a WireGuard VPN) that lets the phone reach the home network from anywhere. Without a single open port on the router.
- Nginx Proxy Manager — a reverse proxy, so instead of remembering
:9443and:3000you go to prettyportainer.madejoradguard.babuszka.
What Tailscale is
Tailscale is a layer on top of WireGuard that builds a private network (a tailnet) between your devices. Each one gets its own 100.x.y.z address and connects to the others directly, over an encrypted tunnel. You forward no ports, you expose nothing publicly — the devices authenticate with an account and only see each other.
Step 1: Tailscale on the server
Connect to the server and install it with the official script (this is another curl | sh, i.e. you run someone else’s script as root — as in part 2, trust the source or read it first):
curl -fsSL https://tailscale.com/install.sh | shThen bring the interface up:
sudo tailscale upA link appears in the terminal — open it in a browser and sign in (Google, GitHub or e-mail). This is where you create the network. The server shows up right away in the admin console at login.tailscale.com. Check your tailnet address:
tailscale ip -4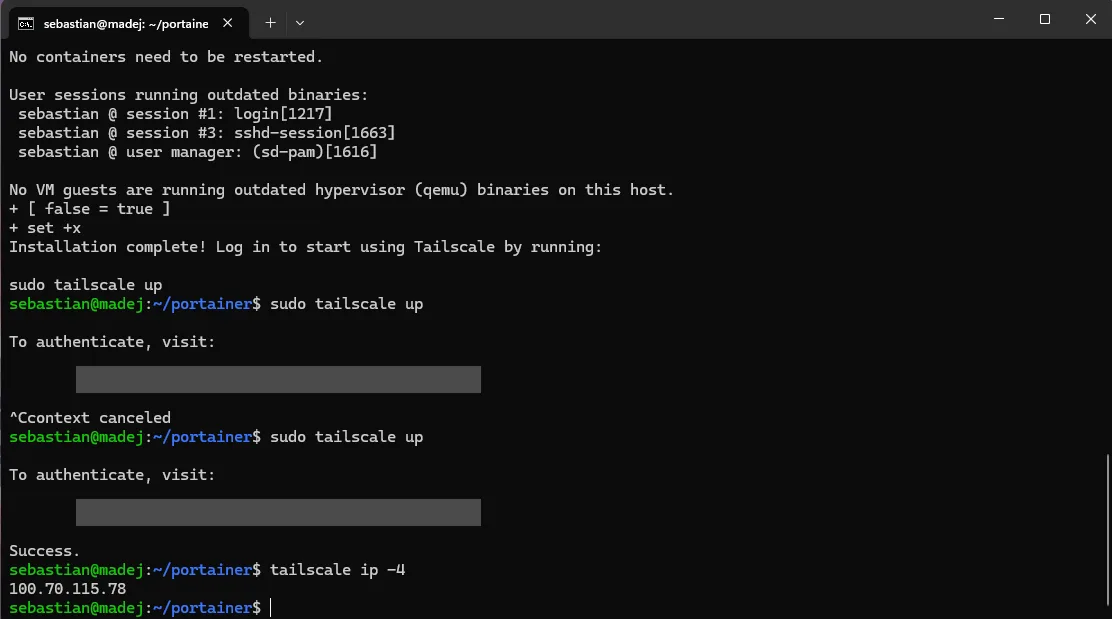
That’s your 100.x — you’ll reach the server by it from any other device in the tailnet. Note it down, you’ll need it for DNS.
In the admin console the server already shows up as a connected device with status Connected.

Protip: disable key expiry
By default a device key expires after a while and you have to sign in again. For a server meant to run 24/7 that’s a pain — one day the tunnel just drops. In the admin console open the server → Disable key expiry. For permanent machines it’s a must-have.
Step 2: Tailscale on the phone
Install the Tailscale app (Android/iOS), sign in with the same account and flip the toggle. The phone is now in the tailnet and sees the server by its 100.x — even over mobile data, on the other side of the country.
For now, though, only the server is visible. We want to see the whole house and get AdGuard’s DNS. That’s two more steps.
Step 3: Subnet router — the whole home network at hand
To reach not only the server but also the router, cameras and other devices from the phone, the server has to advertise the whole home subnet. First we enable packet forwarding — this makes the server pass traffic through itself to the rest of the network, i.e. become a gateway (a subnet router):
echo 'net.ipv4.ip_forward = 1' | sudo tee /etc/sysctl.d/99-tailscale.conf
echo 'net.ipv6.conf.all.forwarding = 1' | sudo tee -a /etc/sysctl.d/99-tailscale.conf
sudo sysctl -p /etc/sysctl.d/99-tailscale.conf
Now we advertise the subnet (the same /24 we worked out in part 1):
sudo tailscale up --advertise-routes=192.168.0.0/24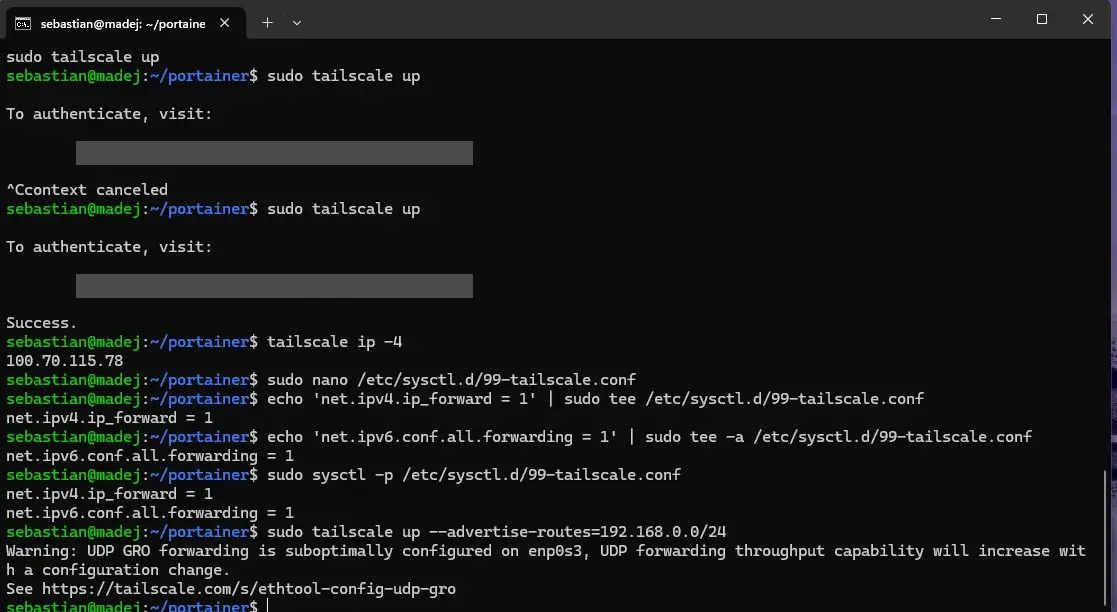
Tailscale may warn that the network card has a suboptimal UDP GRO setting — the tunnel could push UDP faster. That’s not an error, and in a homelab you can safely ignore it. If you want to squeeze out the maximum, enable GRO with a small script that runs every time the interface comes up (replace enp0s3 with your card from ip a):
printf '#!/bin/sh\n\nethtool -K enp0s3 rx-udp-gro-forwarding on rx-gro-list off\n' | \
  sudo tee /etc/networkd-dispatcher/routable.d/50-tailscale
sudo chmod 755 /etc/networkd-dispatcher/routable.d/50-tailscale
sudo systemctl restart networkd-dispatcher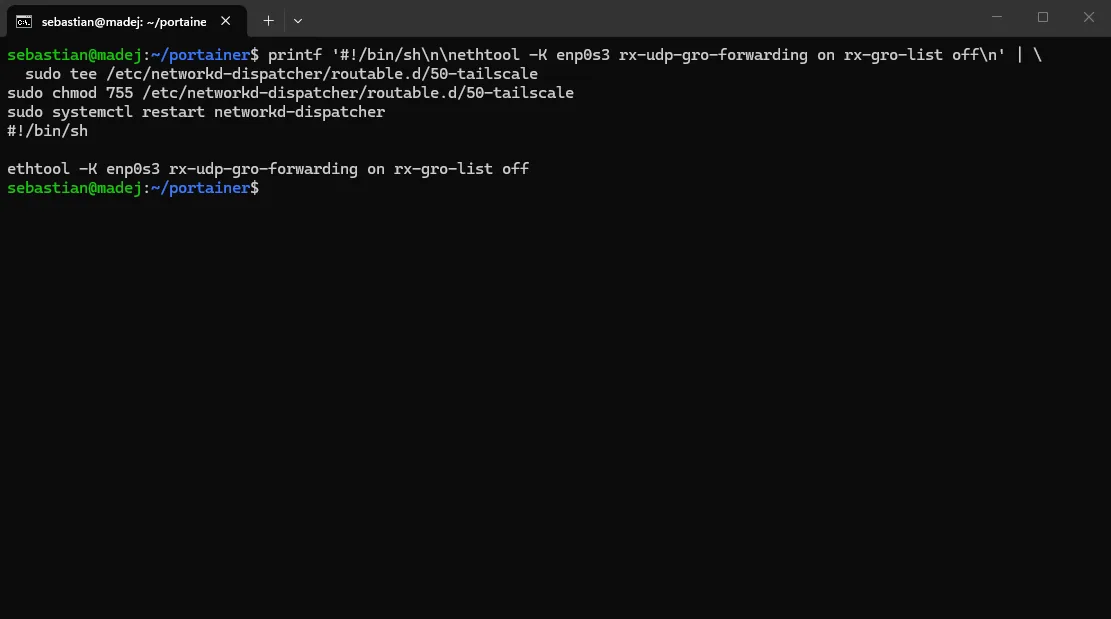
In the admin console a pending route will appear for the server — open Edit route settings and approve it (tick 192.168.0.0/24). On the phone, in the Tailscale settings, turn on “Use subnet routes”. From now on, away from home you reach 192.168.0.1 (the router panel) or any other device as if you were in the living room. We’ll come back to this at the end, because it’s easy to miss.
Step 4: AdGuard DNS even away from home
This is the promise from the end of part 2. We want the phone, away from home, to keep asking our AdGuard, so ads and phishing go in the bin everywhere.
In the admin console go to DNS → Nameservers → Add nameserver. The presets on the list (Google, Cloudflare, Quad9) aren’t what we want — those are public DNS resolvers, and we want to point to our own AdGuard. So we pick Custom…
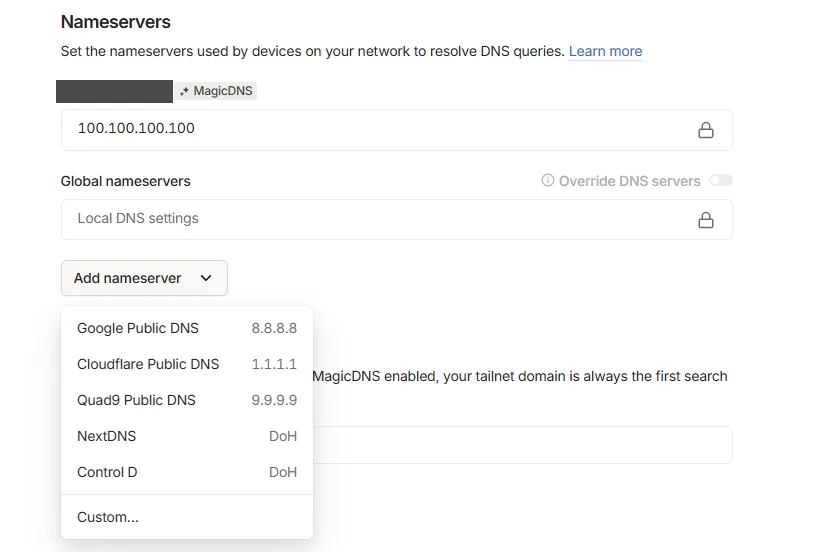
In the field we enter the server’s 100.x address (the one from tailscale ip -4, 100.70.115.78 for me) and turn on Override local DNS.
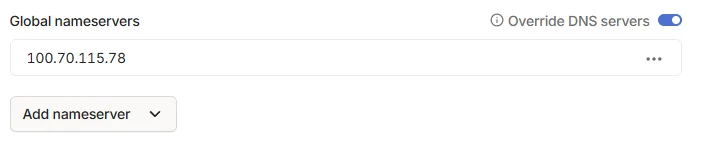
Done — whenever Tailscale is active, all of the phone’s DNS queries go to AdGuard through the encrypted tunnel.
We use the
100.xaddress, not192.168.0.200, because it works independently of the subnet routes and is more reliable when you’re away from home.
Step 5: Nginx Proxy Manager — no more remembering ports
We already have access to everything, but addresses like 192.168.0.200:9443 are ugly and easy to mix up. A reverse proxy is a kind of gatekeeper: it takes a request, looks at the name (e.g. portainer.madej) and forwards it to the right service. One entry point, many services.
We’ll use Nginx Proxy Manager — nginx with a browser panel, so you add hosts by clicking, without hand-writing configs. (There’s also Caddy, but I personally prefer nginx.)
NPM wants ports 80 and 443. In Portainer we add a new stack (remember to pin the version instead of latest):
services:
  npm:
    image: jc21/nginx-proxy-manager:2.11.3
    restart: unless-stopped
    ports:
      - "80:80"
      - "443:443"
      - "81:81"
    volumes:
      - ./data:/data
      - ./letsencrypt:/etc/letsencrypt
A snag: port 80 is taken
I click Deploy and… the deploy fails. Know why? AdGuard grabbed port 80 and NPM has nowhere to bind:
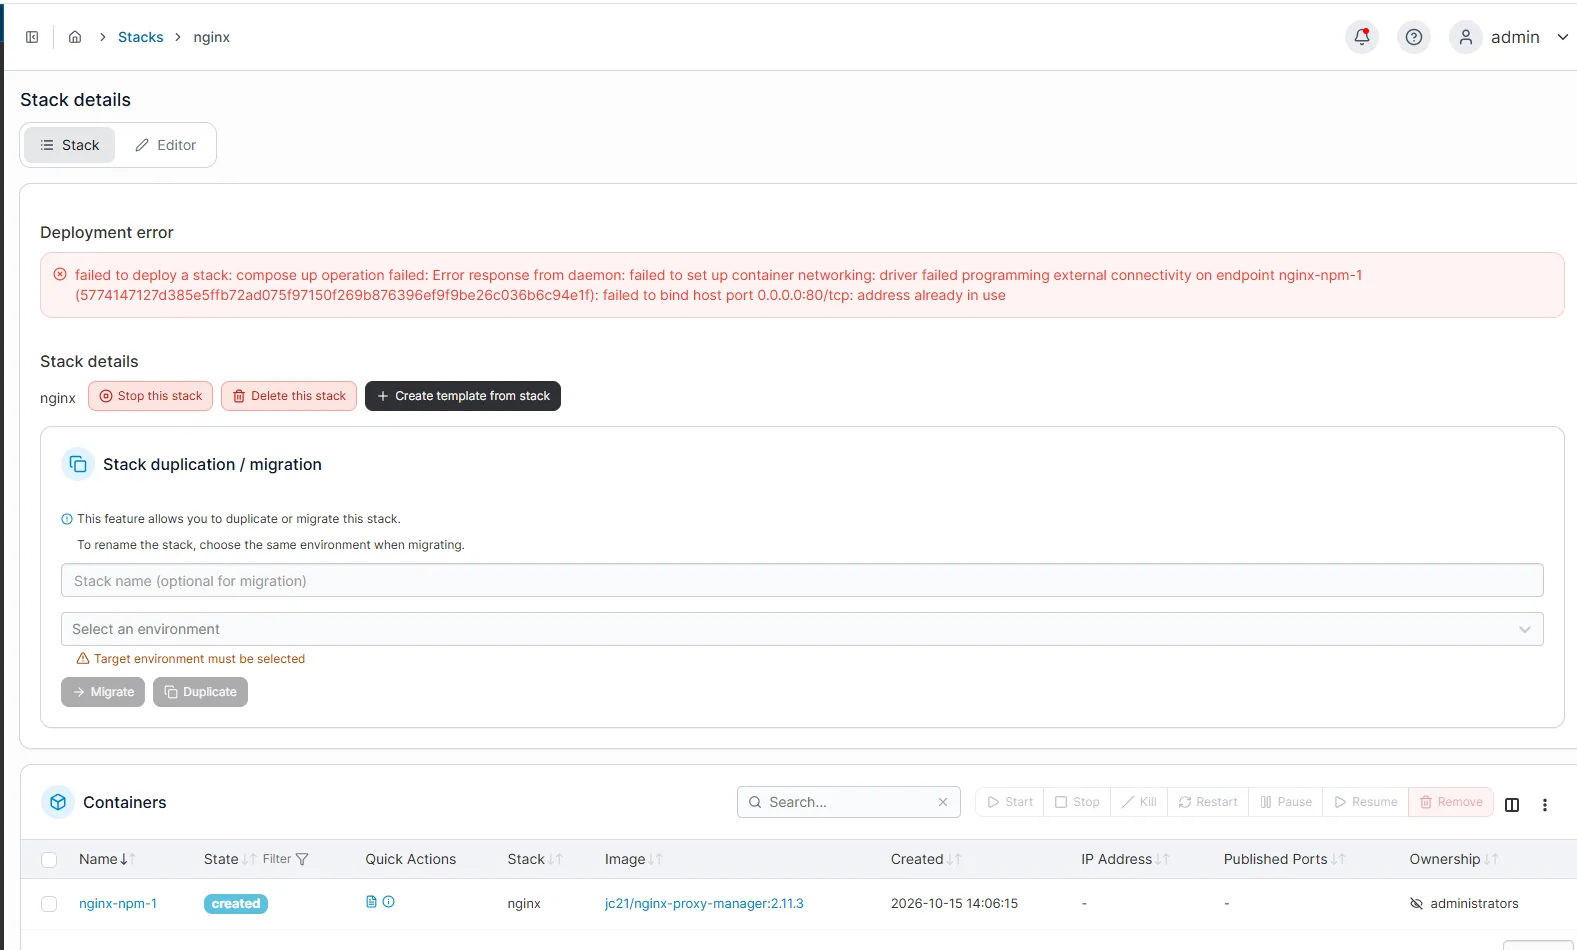
No problem, we’ll sort it out. It’s better for NPM to control traffic coming in on port 80 (the main HTTP port), and AdGuard doesn’t need 80 for anything — for DNS it uses 53. So we move AdGuard’s panel to 3000.
AdGuard runs with network_mode: host, so the panel port lives in its own config, not in compose. First we find it:
sudo find / -name AdGuardHome.yaml 2>/dev/null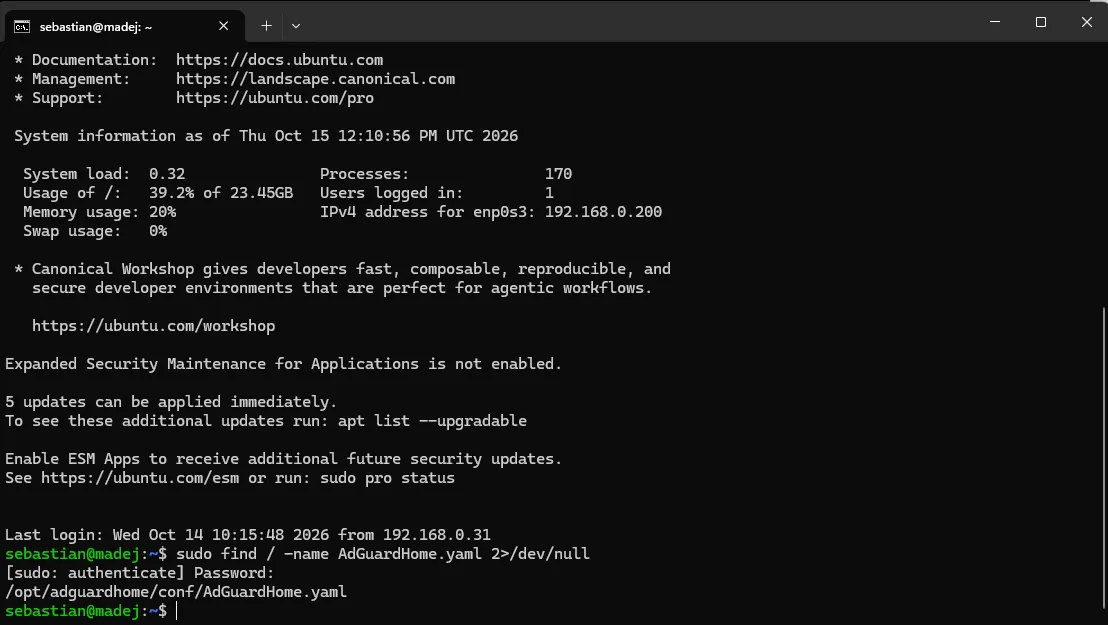
We open it in nano and, right at the top, in the http: section, change the port in address from 0.0.0.0:80 to 0.0.0.0:3000 (Ctrl+S saves, Ctrl+X exits):
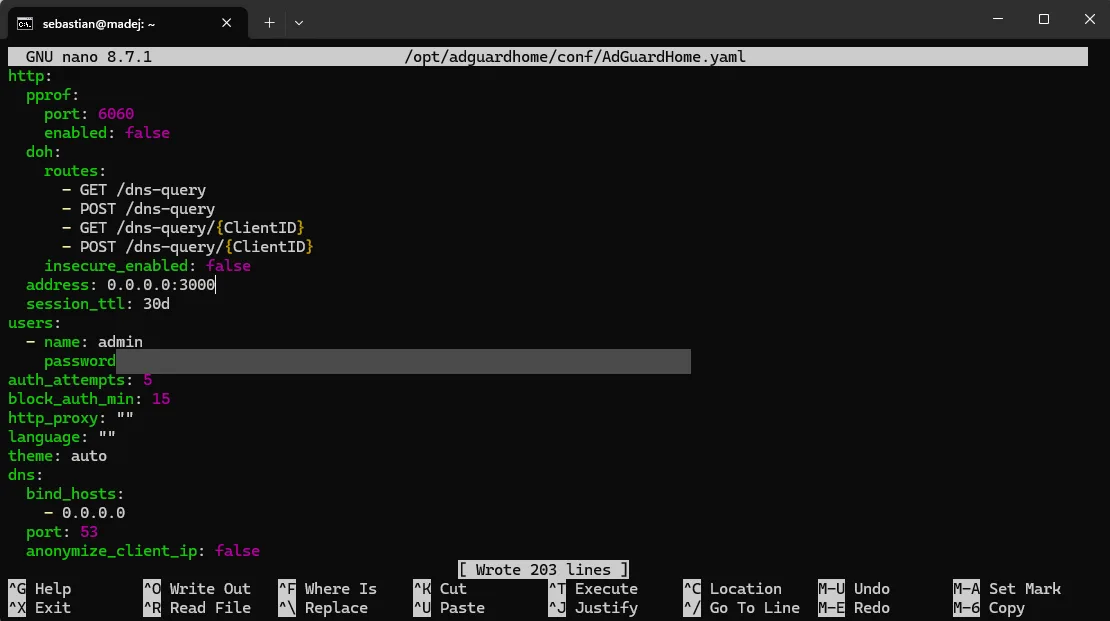
AdGuard reads its config at startup, so we restart the container for the change to take effect:
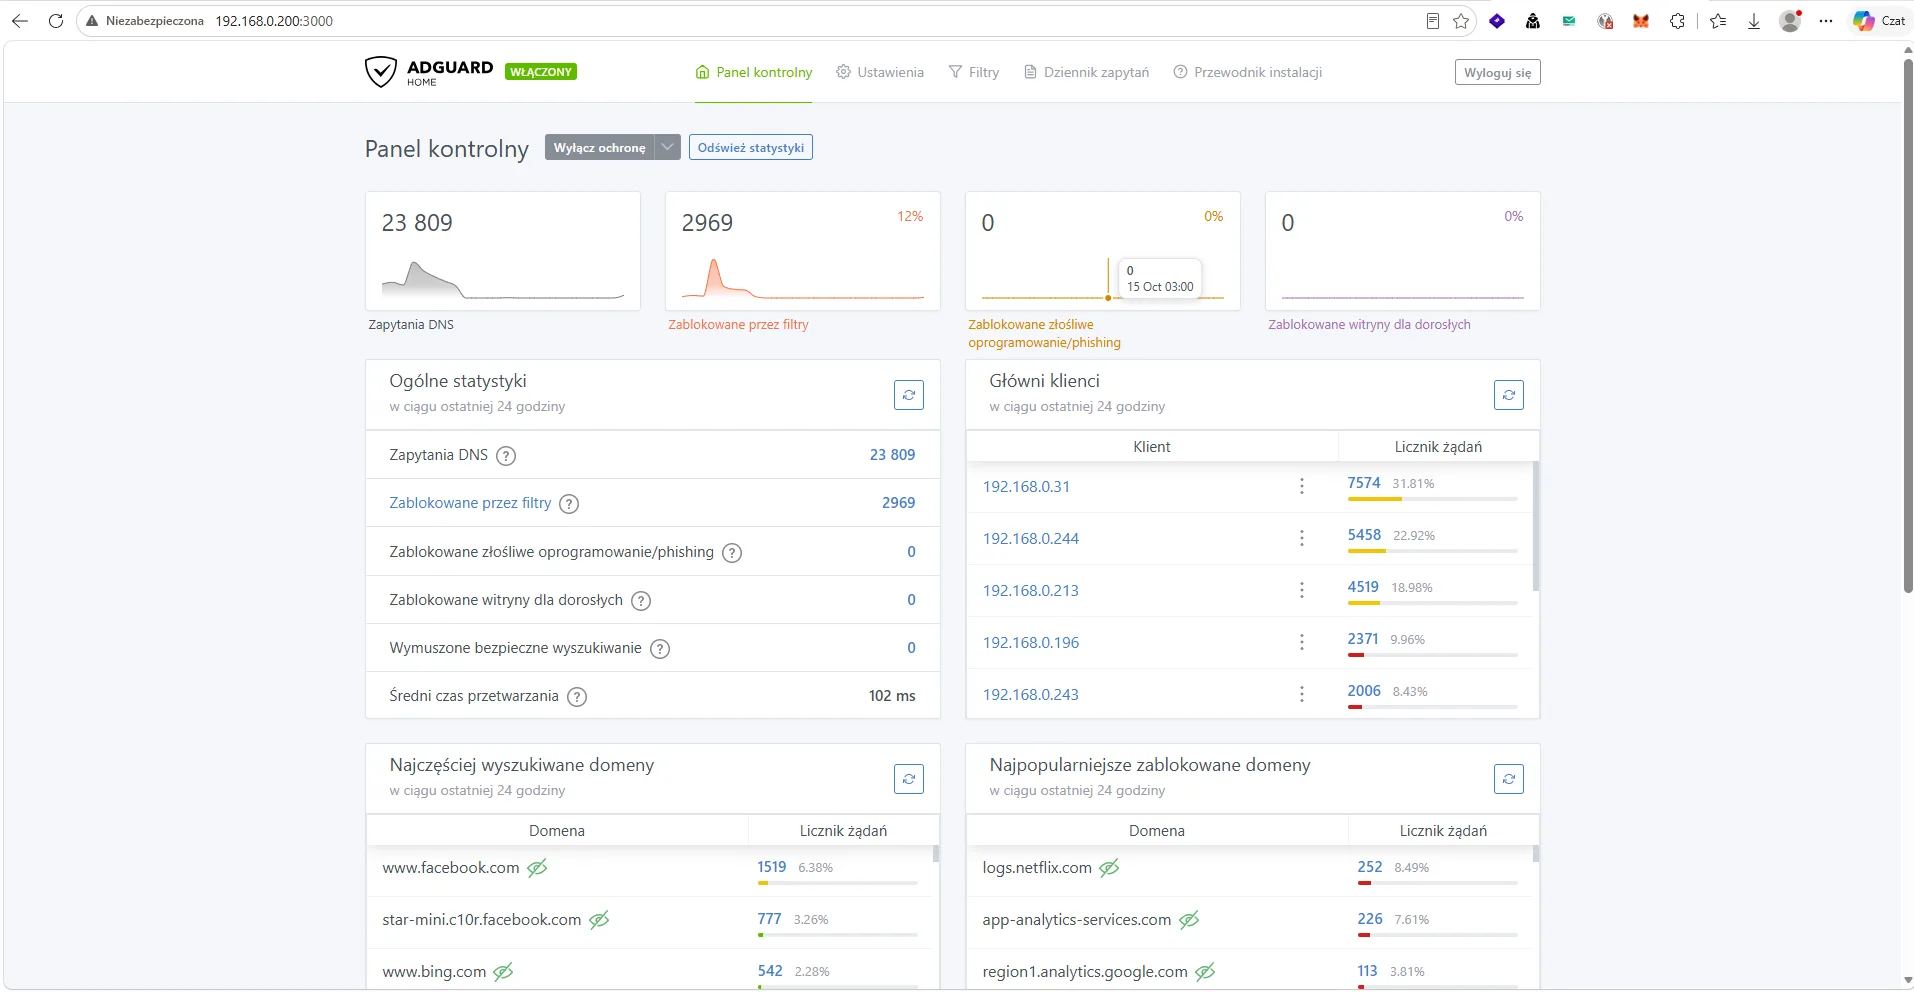
docker restart adguardhomeWe check that AdGuard is alive on the new port — and it is, though it’s been busy: 23,809 DNS queries, of which 2,969 (12%) blocked, average response 102 ms. You can see the network working and filtering nicely.
Now we redeploy the nginx stack in Portainer — and this time NPM comes up without a hitch, with ports 80/443/81.

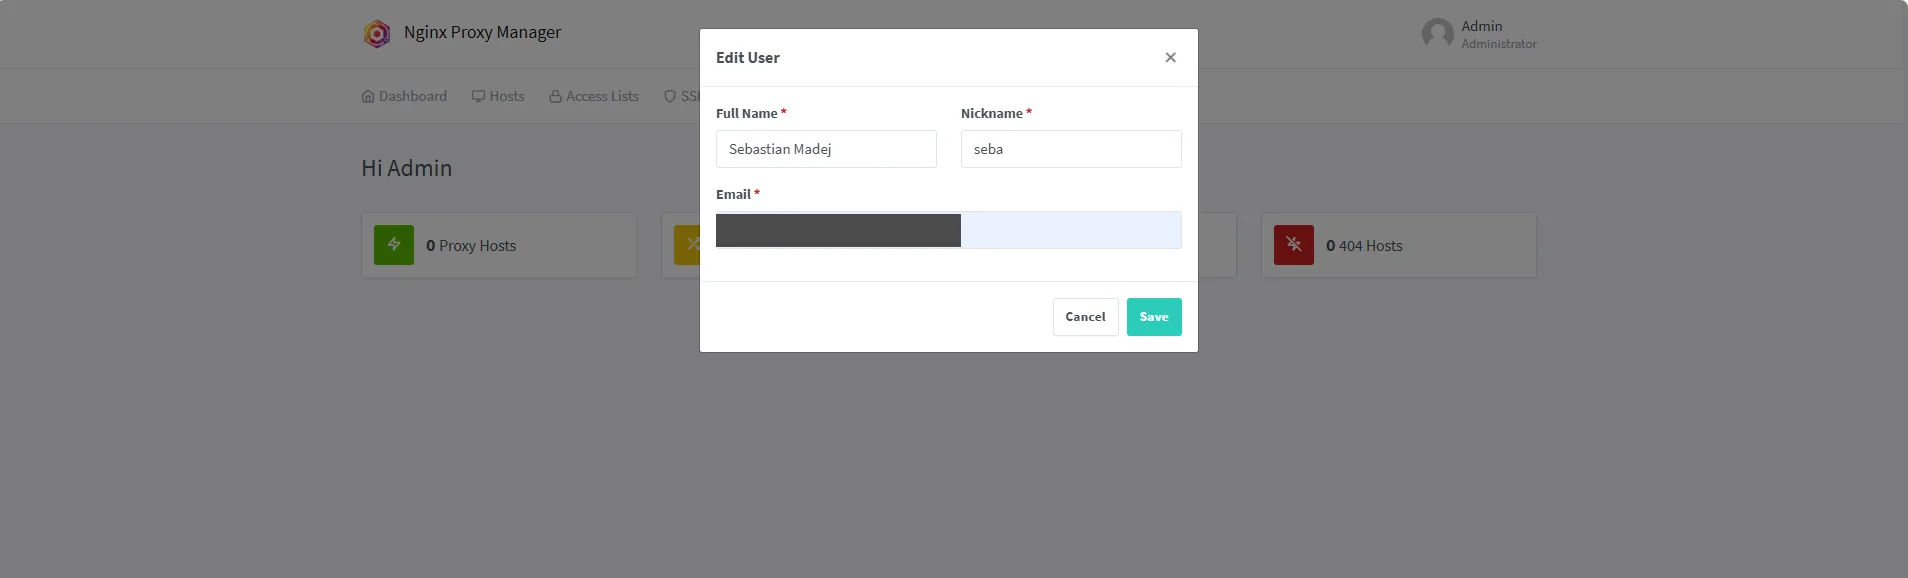
You open NPM’s panel at http://192.168.0.200:81. The default login is admin@example.com / changeme — change it immediately after the first sign-in. A default password on a service exposed even on the local network is a classic people get caught out by. After signing in, NPM prompts for new account details and a new password right away.
Step 6: pretty names — the gatekeeper and the translator
Now the fun part. We need two pieces that play together:
- NPM (the gatekeeper) — from the name it knows which service and which port to forward to;
- AdGuard (the translator) — translates the name into the server’s IP address. It’s a DNS server after all, i.e. a name-to-address translator by definition. At our place it just looks nicer.
We start with the gatekeeper. In NPM go to Hosts → Proxy Hosts → Add Proxy Host and for each service enter the name, scheme, server address and port. It’s good to also enable Block Common Exploits:
nginx.madej→http→192.168.0.200:81portainer.madej→https→192.168.0.200:9443(schemehttps, because Portainer has a self-signed certificate)adguard.babuszka→http→192.168.0.200:3000
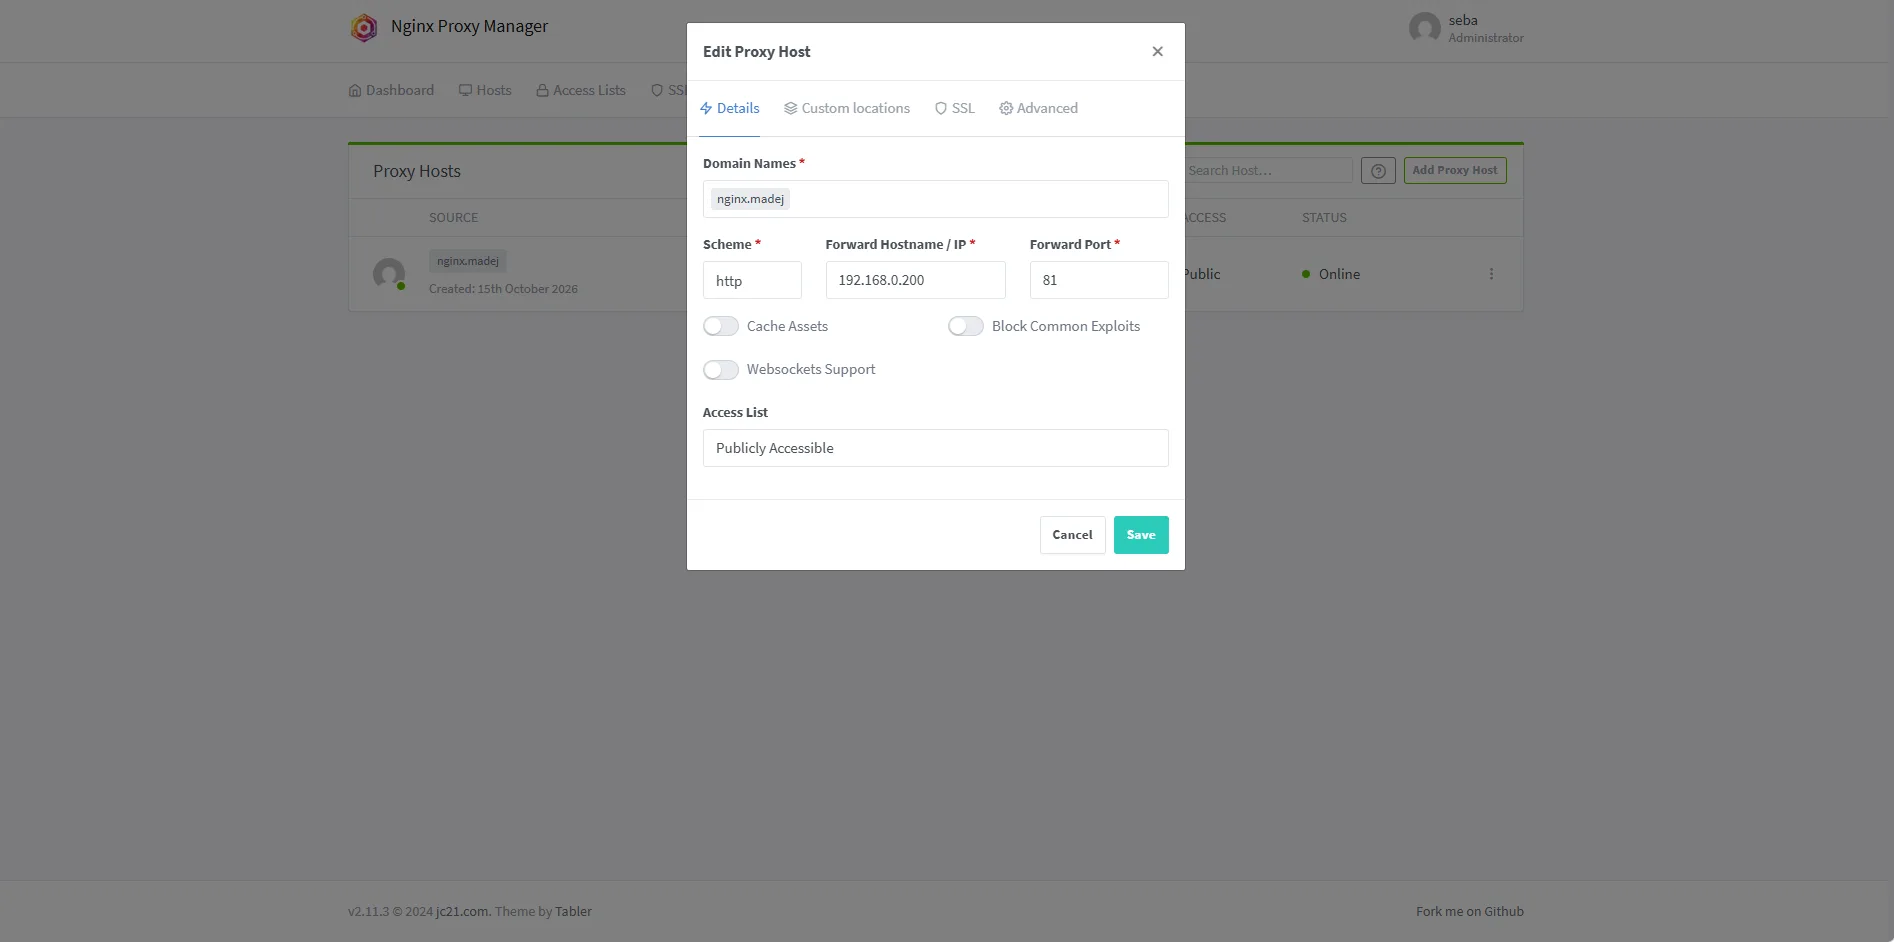
For a laugh I set adguard.babuszka (“babuszka” = granny) — to show you it’s entirely arbitrary. You make up whatever name you want, and it affects nothing anywhere in the world, because it only works inside your network.
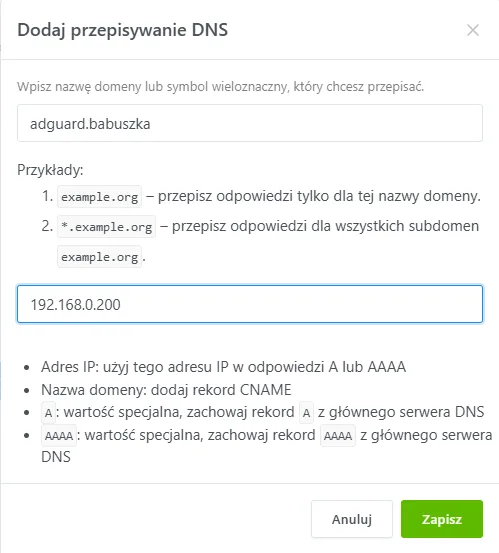
Now the translator. In AdGuard go to Filters → DNS rewrites → Add DNS rewrite and point each name to the server’s address (the one where NPM runs — not the service port; NPM handles the rest):
nginx.madej→192.168.0.200portainer.madej→192.168.0.200adguard.babuszka→192.168.0.200
Heads-up if you play with different suffixes like I did (
.madejand.babuszka): a*.homewildcard only covers names ending in.home. With mixed suffixes, either add each name separately (as above) or make a wildcard per suffix (*.madej,*.babuszka).
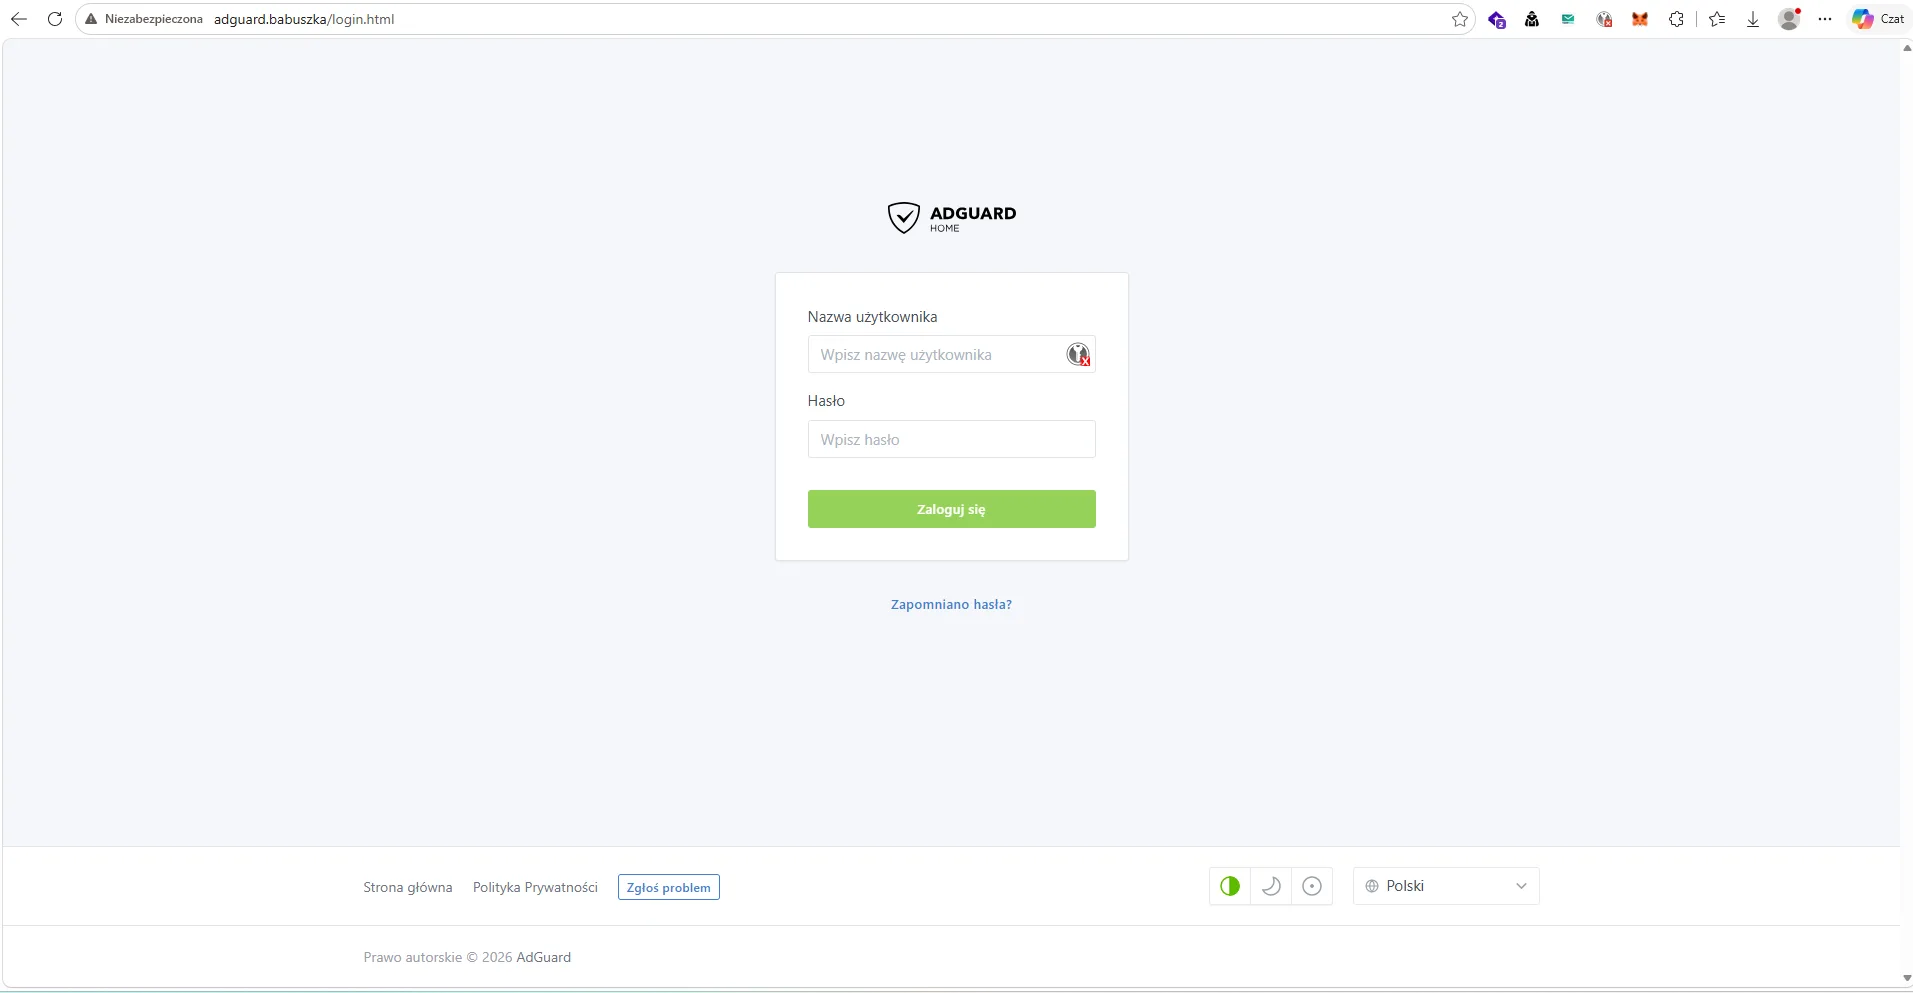
We test at home — we type adguard.babuszka, nginx.madej, portainer.madej and each name nicely lands on its service, without ports.
What about HTTPS?
NPM has built-in Let’s Encrypt, but for internal names like .madej/.babuszka it won’t work — Let’s Encrypt only issues certificates for real, public domains. On a private network plain http is perfectly fine (the traffic rides the encrypted Tailscale tunnel anyway). If you ever want a real padlock, you have to attach your own domain and a certificate via a DNS challenge — but that’s a topic for another post.
The payoff — the money shot on mobile data
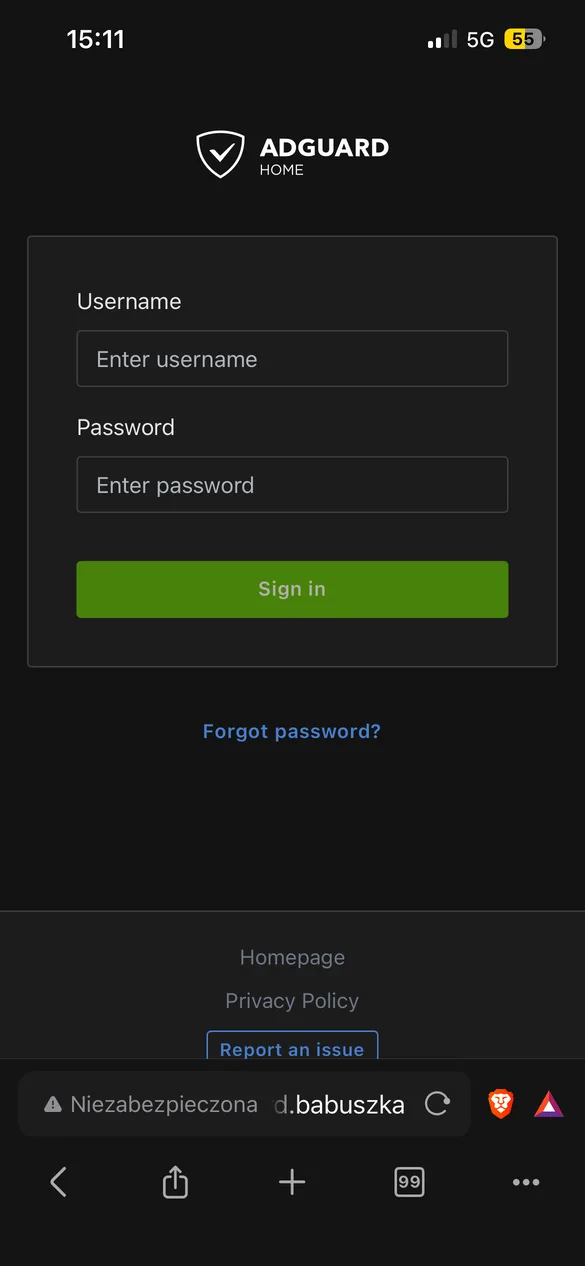
And now the point of the whole part 3. You’re out in town, you turn off Wi-Fi, only mobile data (LTE/5G) is left, you flip the Tailscale toggle on the phone and type adguard.babuszka. It opens — the AdGuard login panel, over mobile data, from anywhere.
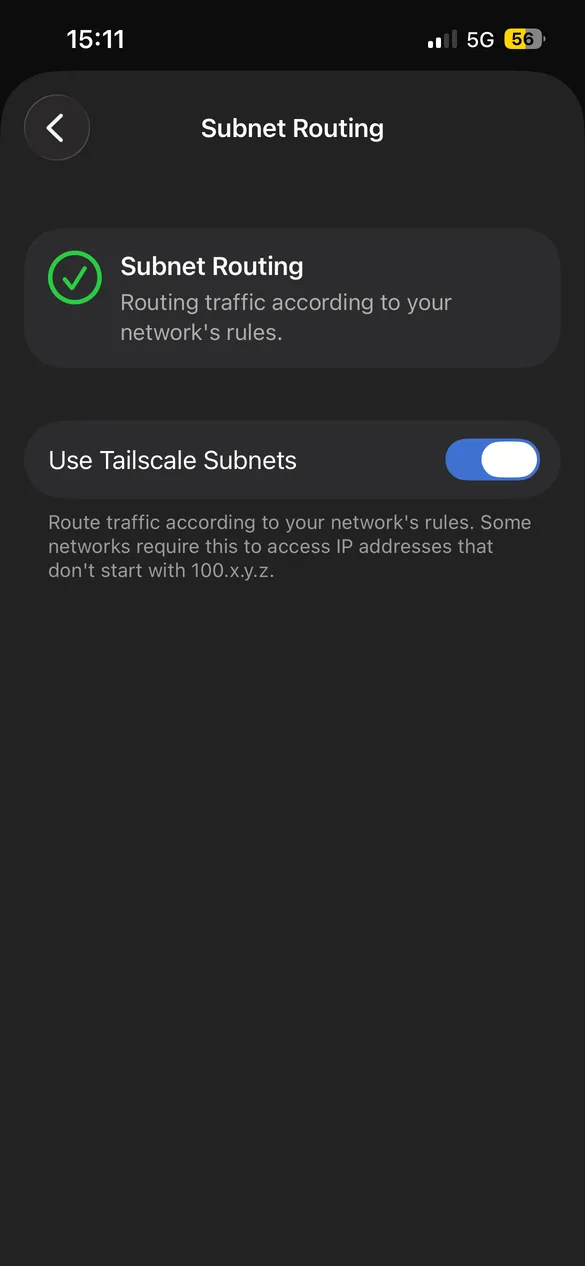
If the names don’t work for you away from home right away, check two things that are easy to miss (I got stuck on them myself):
- the subnet route is approved in the admin console (
Machines → server → Edit route settings → 192.168.0.0/24); - “Use subnet routes” is enabled in the phone app — without it the phone sees the route but doesn’t use it, and can’t reach
192.168.0.xaddresses.
A quick test that separates the problems: if http://100.70.115.78:3000 (the server’s tailnet address itself) works but the names don’t, the tunnel is fine and the issue is only the subnet route (the points above). If even 100.x won’t open, the phone isn’t actually connected.
The end result:
- you reach
portainer.madejandadguard.babuszkaas if at home; - you open the router panel at
192.168.0.1and other devices on the network; - ads and phishing are cut, because DNS still goes to AdGuard;
- and on the router there’s not a single port open to the world.
That’s the difference between “I exposed a service to the internet and hope nobody finds it” and “I exposed nothing, and I still have access to everything”.
What’s next
I’ve given you a sandbox — what you do in it is up to you. Nobody will slip you a phishing page that AdGuard won’t cut; you’re protected exactly as well as you configure it yourself, at home and away.
But that’s not all. In the next parts I’ll show how to scan your own networks for vulnerabilities and how to set up a SIEM (Wazuh), to keep checking on the fly that everything is healthy and nothing suspicious is happening. Along the way there’s still SSH keys instead of passwords and subnetting from the ground up.
Remember: the best protection is the one an attacker can’t see at all. Don’t expose yourself to the world without reason — and protect the people close to you.