Homelab from scratch, part 2: AdGuard Home in Docker for the whole house
Docker, Portainer and AdGuard Home on Ubuntu Server, freeing port 53, pointing the router's DNS at it, and the CERT Polska blocklist. An ad, tracking and phishing filter for every device at home, without installing anything on phones.
Czytaj po polskuIn part 1 we set up Ubuntu Server with the static address 192.168.0.200 and SSH access. Now we install AdGuard Home on it: a DNS server that checks every query against lists of ads, trackers and malicious domains before passing it on. If a domain is on a list, the device simply doesn’t get it.
The best part is that it works for every device on the network at once: Mum’s phone, Grandma’s tablet, the TV. Nobody installs anything, and a phishing site pretending to be a bank won’t even open.
How to install it?
There are a few options: AdGuard can be installed directly on the system or in a Docker container. I like working with Docker, so that’s the route I’ll show. It’s a little more involved, but here’s a pro tip: we’ll use Portainer, a graphical front end for Docker that runs in the browser. With it, new services take a few clicks.
Step 1: Docker
First, clear the screen after the updates from part 1 with clear (man, do I miss zsh here). Most of the commands are on Docker’s website. To start, make sure curl is installed:
sudo apt install -y curlI already had curl, so on to the main part. Docker has an official installation script:
curl -fsSL https://get.docker.com | sudo sh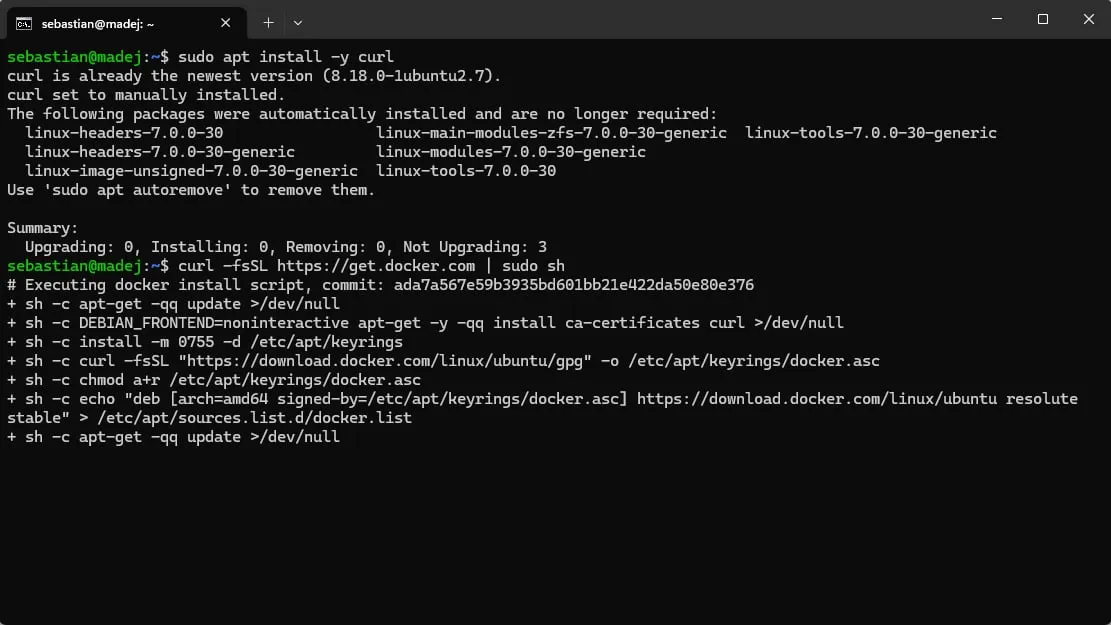
A security note: curl ... | sudo sh means “download a script from the internet and run it as root right away”. Here it’s Docker’s official script fetched over HTTPS, so the risk is small, but you should know what you’re doing. The more careful version is to download the script, read it, and only then run it:
curl -fsSL https://get.docker.com -o get-docker.sh
less get-docker.sh
sudo sh get-docker.sh
The installation succeeded. Note the warning at the end: access to Docker is practically root access to the whole machine.
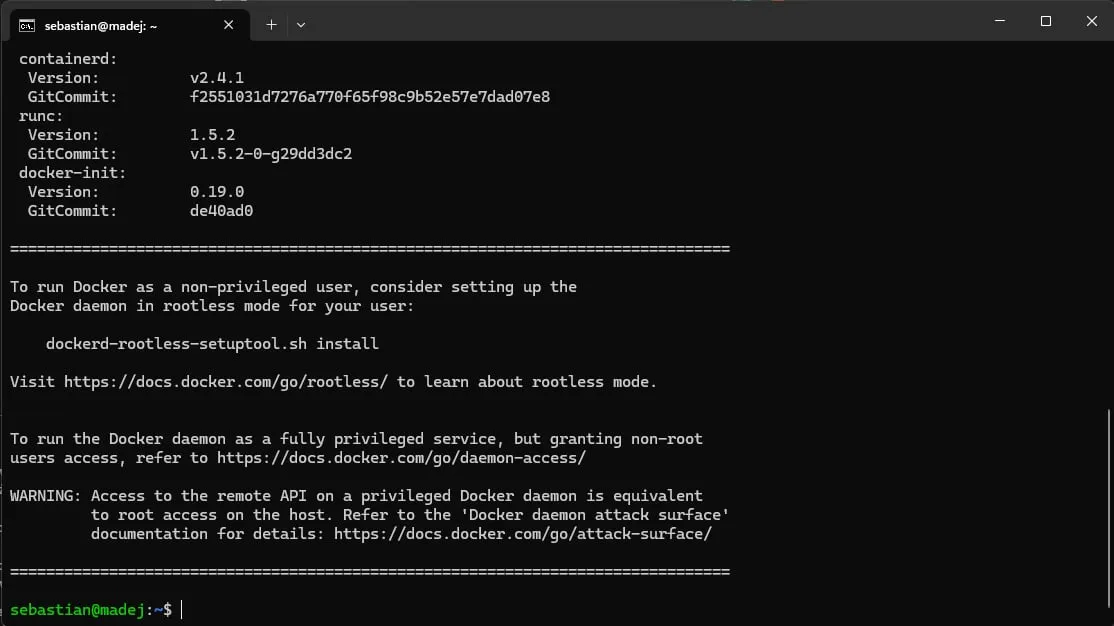
So we don’t have to type sudo before every Docker command, we add our user to the docker group, and newgrp refreshes the permissions right away without logging out:
sudo usermod -aG docker $USER
newgrp docker
Because of that warning, the docker group is effectively a second sudo, so only add yourself to it. Let’s check that everything works:
docker run --rm hello-world
docker compose version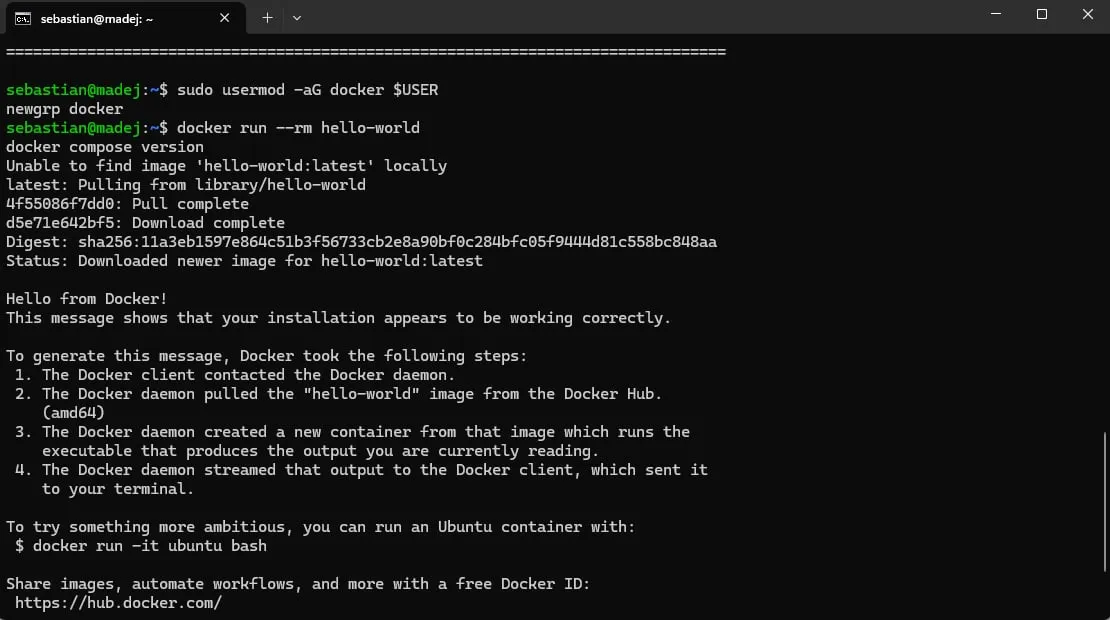
Step 2: Portainer
Create a folder for our new friend and a docker-compose.yml file:
mkdir -p ~/portainer && cd ~/portainer
nano docker-compose.yml
Out of habit I typed sudo nano here, but sudo isn’t needed in your home directory and only makes the file owned by root. Paste in:
services:
  portainer:
    image: portainer/portainer-ce:lts
    container_name: portainer
    restart: unless-stopped
    ports:
      - "9443:9443"
    volumes:
      - /var/run/docker.sock:/var/run/docker.sock
      - ./data:/data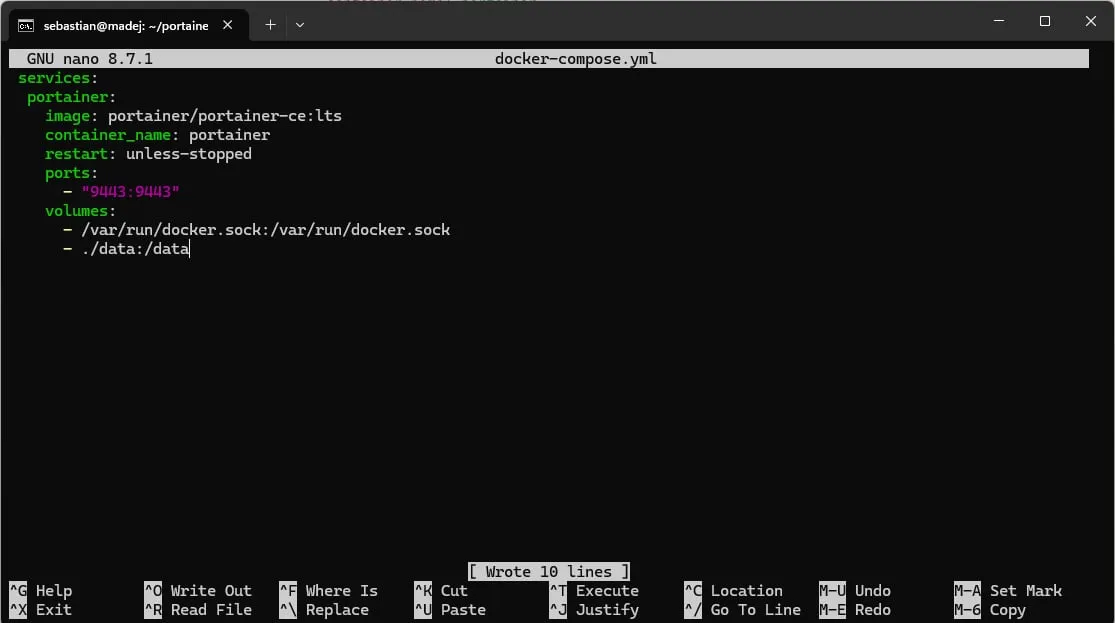
What’s going on here:
portainer-ce:ltsis the free Community Edition from the long-term support (LTS) branch;restart: unless-stoppedmeans the container comes back by itself after the server restarts;9443is the panel’s port (HTTPS);docker.sockgives Portainer control over Docker, and therefore over the whole machine. That’s why the Portainer password has to be really strong;./datais where Portainer keeps its settings so they survive a container update.
Save (Ctrl+S), exit (Ctrl+X) and put Portainer in the game:
docker compose up -d
docker ps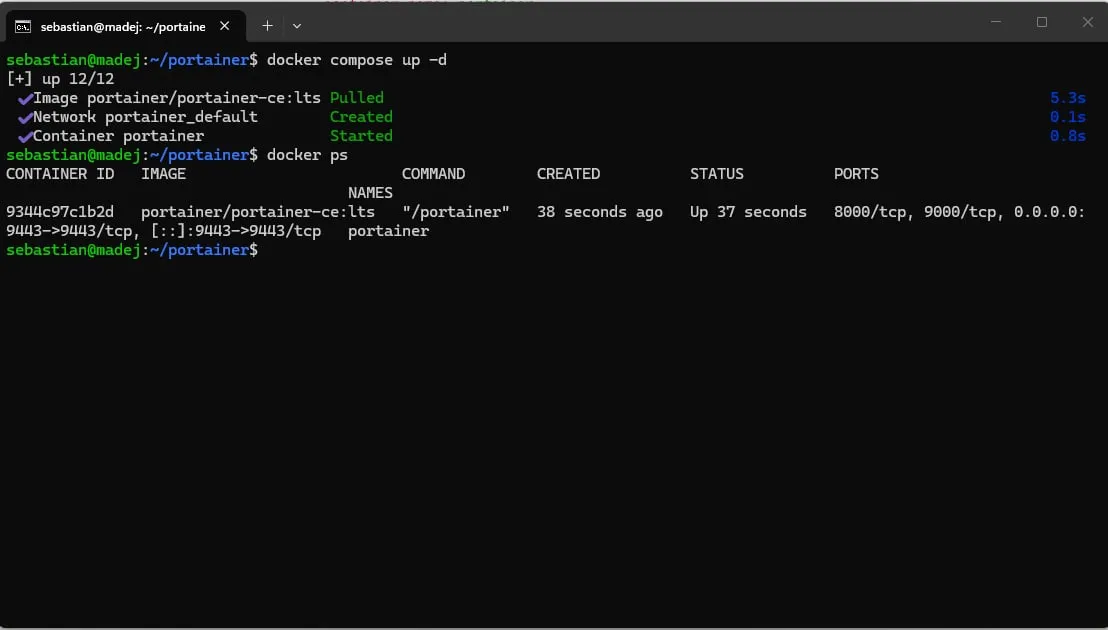
First login
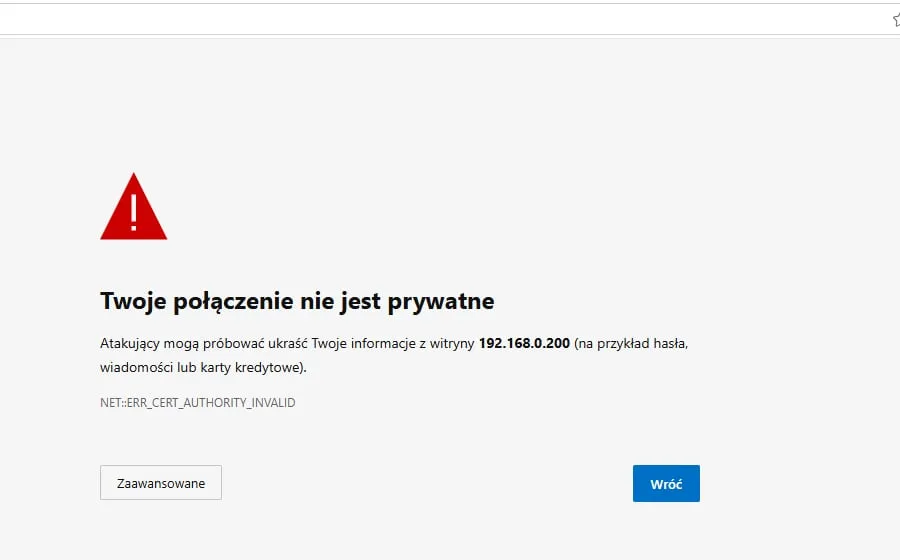
In the browser I go to 192.168.0.200:9443 and see:

Relax, you just need to add the protocol: https://192.168.0.200:9443. Now the browser warns that the connection isn’t private. That’s because Portainer uses a self-signed certificate that no trusted authority issued. On our own network and our own server we can click Advanced → Proceed. On anyone else’s site, never ignore this warning.
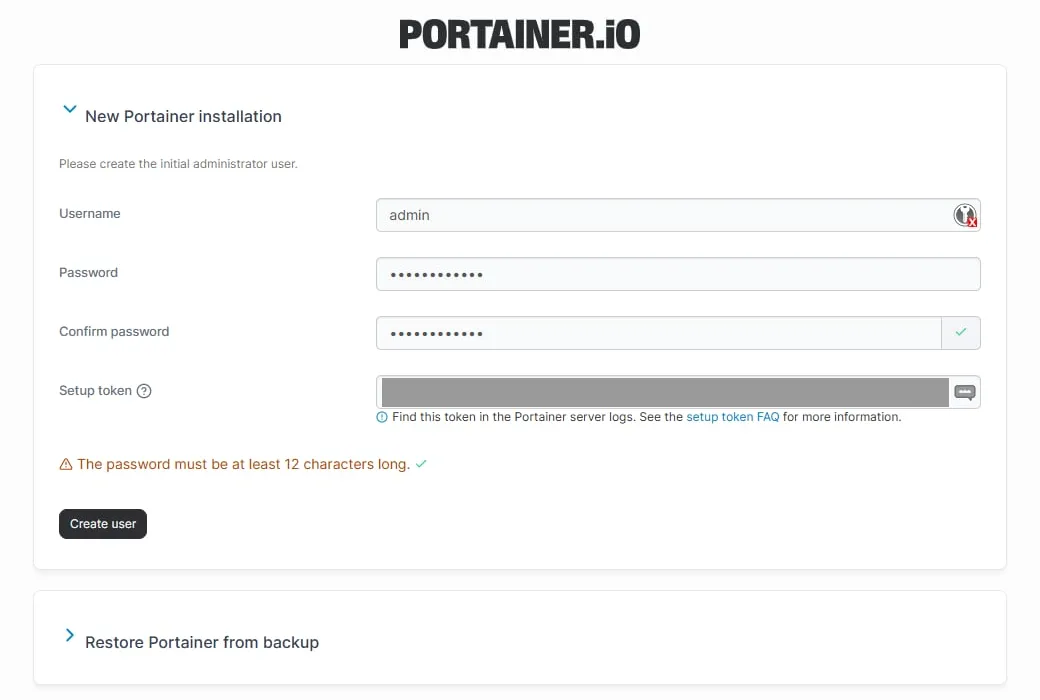
The Portainer logo appears and we set the admin password, at least 12 characters. Portainer also asks for a setup token, which is in the container logs:
docker logs portainerThe token sits inside a box of =====. Copy it and paste it in. By the way, the screenshot below shows I first typed docker ps portainer, which of course doesn’t work. Logs are docker logs.
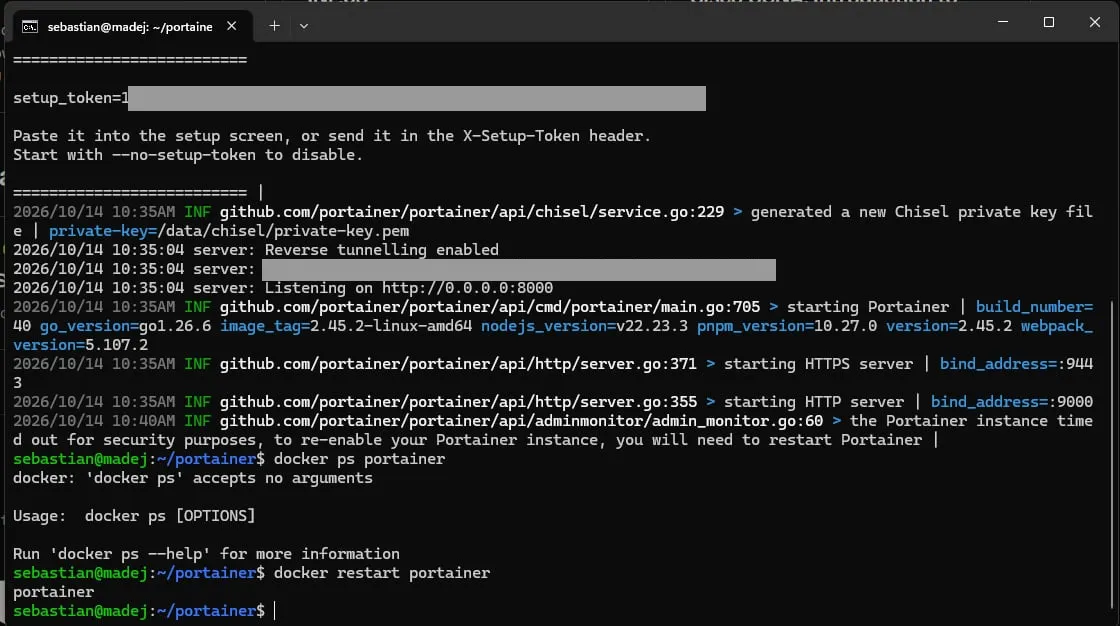
And another mistake: I took too long and hit a timeout. For security reasons, a fresh Portainer only waits 5 minutes for the admin account to be created, so nobody else on the network can grab it first. Restart the container and repeat the steps with the new token:
docker restart portainer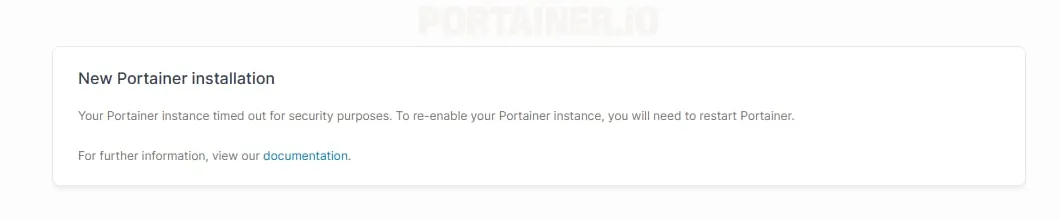
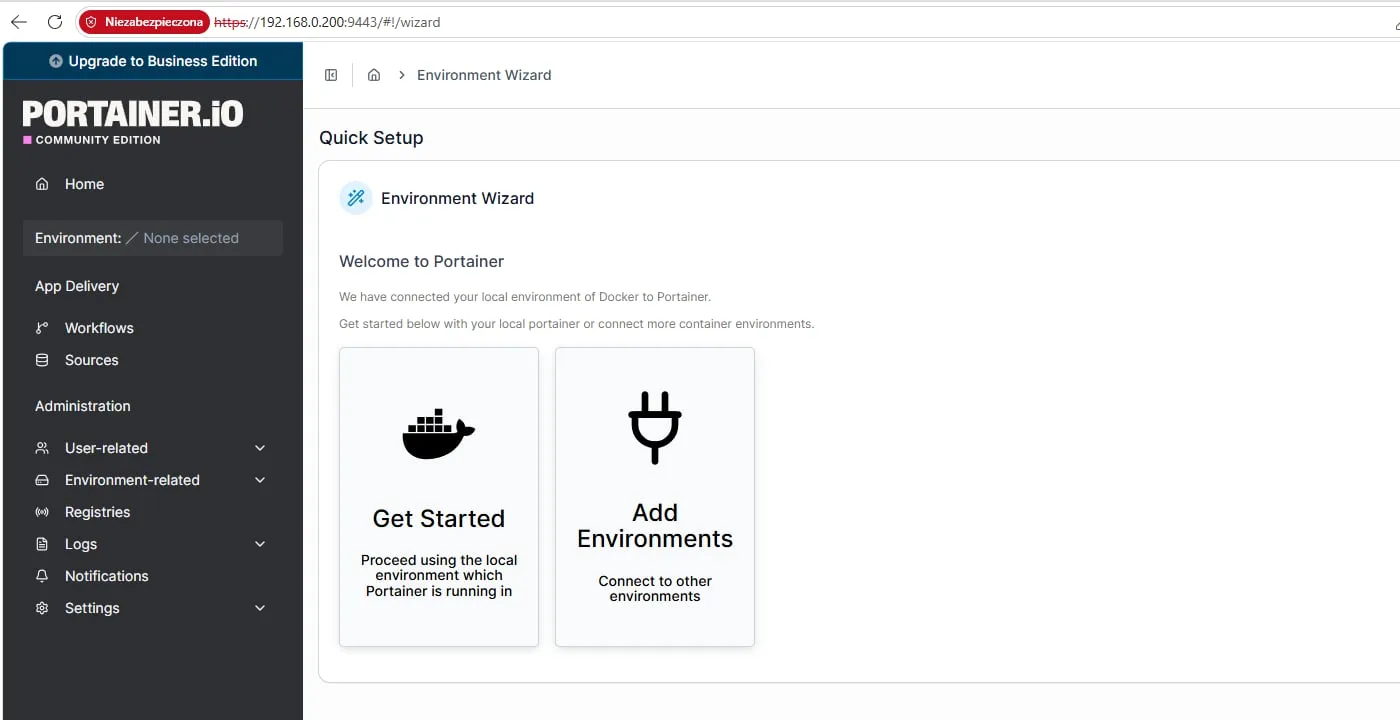
After logging in, the wizard asks about the environment. Click Get Started, which is the local Docker that Portainer itself runs on. Skip the Edge options: they’re for managing devices behind NAT, and we have everything on one LAN. You can always set that up later.
Step 3: freeing port 53
A DNS server runs on port 53. On Ubuntu that port is already taken by systemd-resolved, the system’s DNS stub resolver listening on 127.0.0.53. If we don’t turn it off, AdGuard can’t take the port. Enter this stack of commands:
sudo mkdir -p /etc/systemd/resolved.conf.d
printf "[Resolve]\nDNS=127.0.0.1\nDNSStubListener=no\n" | sudo tee /etc/systemd/resolved.conf.d/adguard.conf
sudo mv /etc/resolv.conf /etc/resolv.conf.bak
sudo ln -s /run/systemd/resolve/resolv.conf /etc/resolv.conf
sudo systemctl restart systemd-resolved
sudo mkdir -p /opt/adguardhome/work /opt/adguardhome/conf
Step by step:
- create a directory for extra
systemd-resolvedconfiguration; - in
adguard.conf, turn off listening on port 53 (DNSStubListener=no) and tell the system to ask AdGuard as well (DNS=127.0.0.1); - back up the old
/etc/resolv.conf; - replace it with the file listing the real DNS servers instead of the stub that no longer exists;
- restart the service so the changes apply;
- create directories for AdGuard’s data and configuration.

To be sure, check that nothing is listening on port 53 anymore. The command should return nothing:
sudo ss -tulpn | grep :53Step 4: AdGuard Home as a Portainer stack
In Portainer pick the local environment, go to Stacks and click Add stack on the right. Name it adguard and paste this into the Web editor:
services:
  adguardhome:
    image: adguard/adguardhome:latest
    container_name: adguardhome
    restart: unless-stopped
    network_mode: host
    volumes:
      - /opt/adguardhome/work:/opt/adguardhome/work
      - /opt/adguardhome/conf:/opt/adguardhome/conf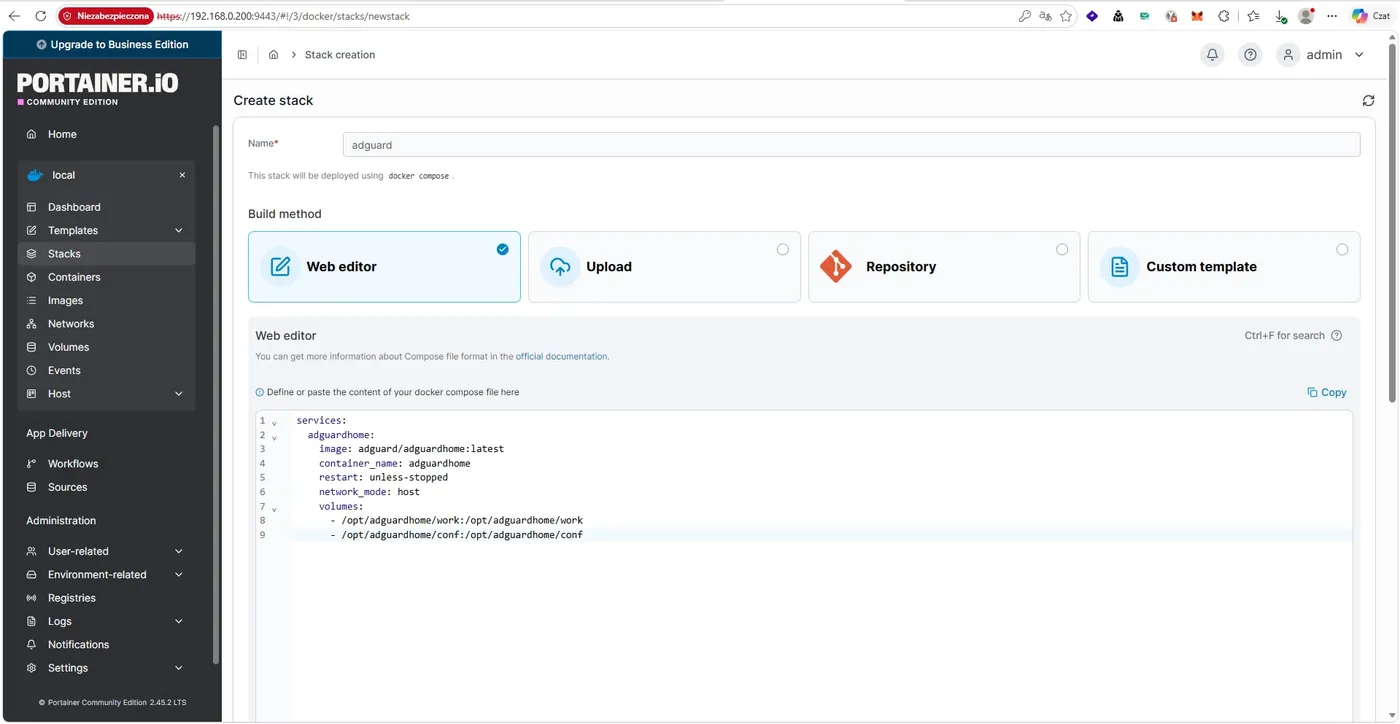
network_mode: host means the container uses the server’s network directly, with no port mapping. For a DNS server that’s the simplest option: AdGuard takes port 53 itself and sees the real addresses of the devices asking, so the statistics show who queries what. The volumes directories keep the configuration and statistics across container updates.
A small note: :latest always means the newest version. That’s convenient at home, but on a serious server it’s better to pin a specific version so an update doesn’t catch you by surprise.
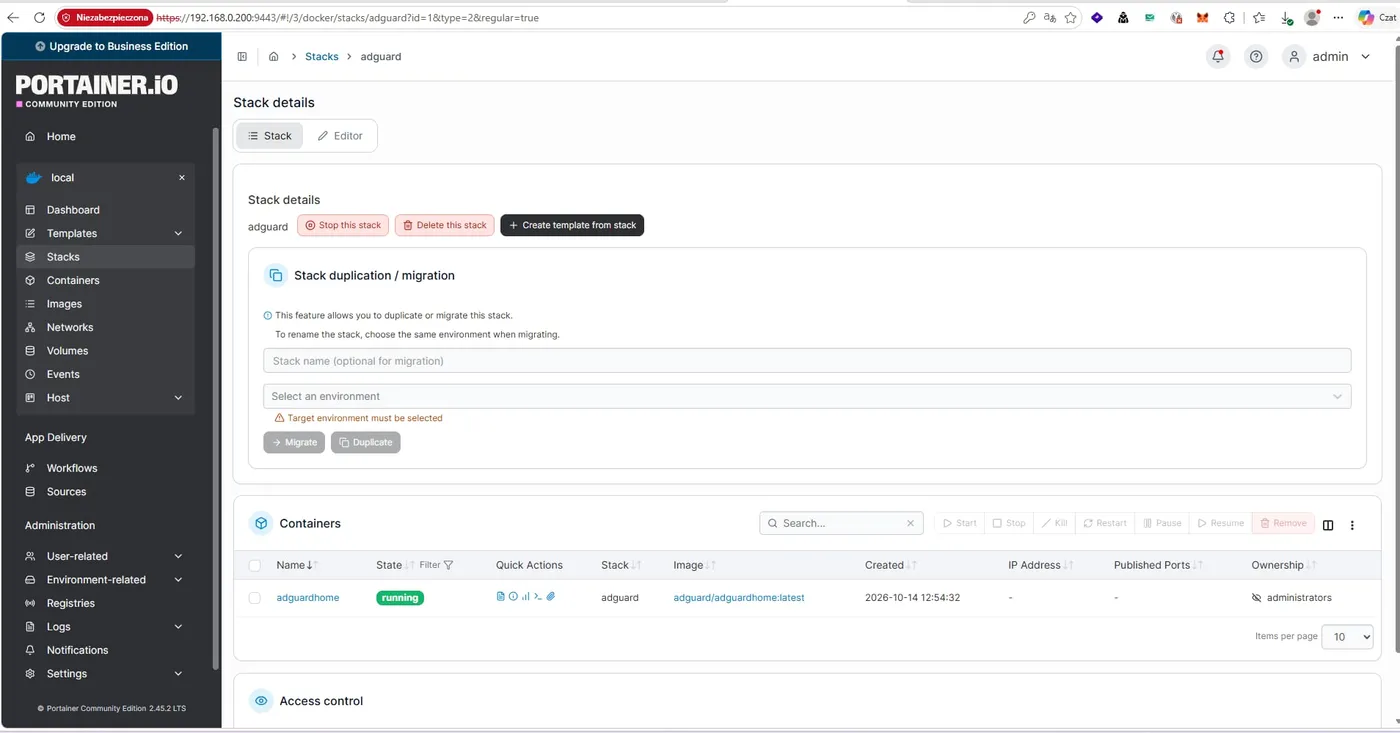
Click Deploy the stack at the very bottom. The stack shows running, so we’re in the big leagues.
Step 5: configuring AdGuard
To reach AdGuard, open the server’s address with port 3000 in the browser, for me http://192.168.0.200:3000. The setup wizard greets us. Click through it, but stop for a moment at the second step:
- DNS server: all interfaces, port 53. Don’t change this;
- Admin web interface: this is the port the panel will use after setup. The wizard suggests 80 by default. If you plan to run more services with a web interface on this server, it’s better to keep port 80 free and give the panel another port, such as 3000.
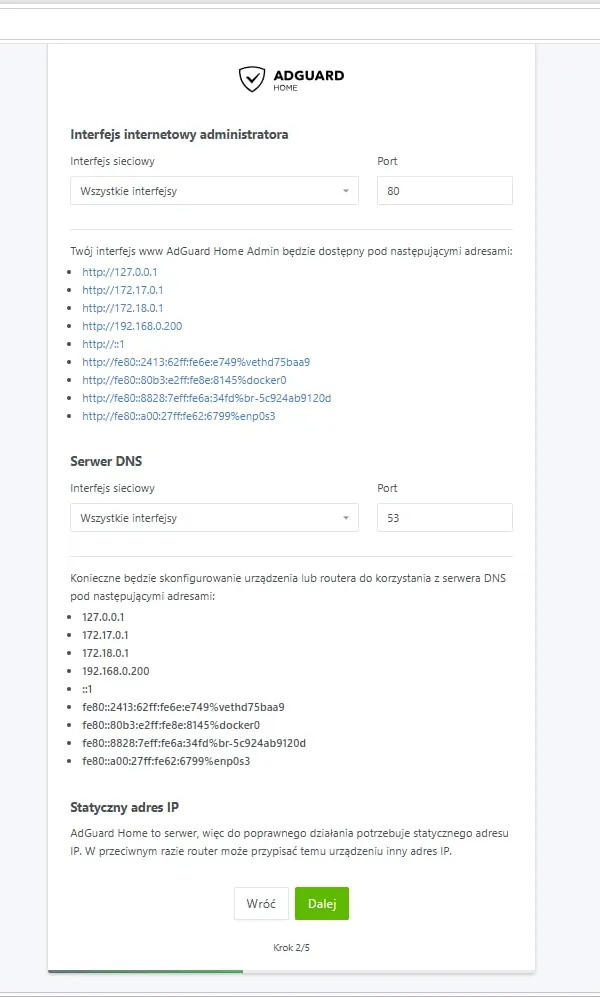
Then set a username and password for the panel. Even if AdGuard is only reachable on the local network, you don’t want anyone in the house, or any guest, poking around in it. Finally, open the dashboard. All the statistics are zero for now, because nothing is using it yet.
Step 6: the whole house through AdGuard
Now the most important part: every device needs to ask our server for DNS. We do that in the router, because the router hands out addresses and DNS servers to devices over DHCP.
I have a TP-Link Archer AX55, so I log in at 192.168.0.1 and go to Advanced → Network → DHCP Server. There I set:
- Primary DNS:
192.168.0.200 - Secondary DNS:
192.168.0.200
Your router’s panel may look different, but look for the DHCP settings and the DNS fields.
Why the same address twice? If I set a public DNS such as 1.1.1.1 as the secondary, devices would sometimes ask that one instead and ads would leak through. The price is that if the server goes down, the whole house loses internet, because nothing resolves domain names. My Fedora host runs 24/7, so I accept that, but keep it in mind before you shut down the computer AdGuard runs on.
Then restart the router (not reset: the reset button restores factory settings!) or simply disconnect and reconnect your devices so they pick up the new settings.
A quick test on one computer
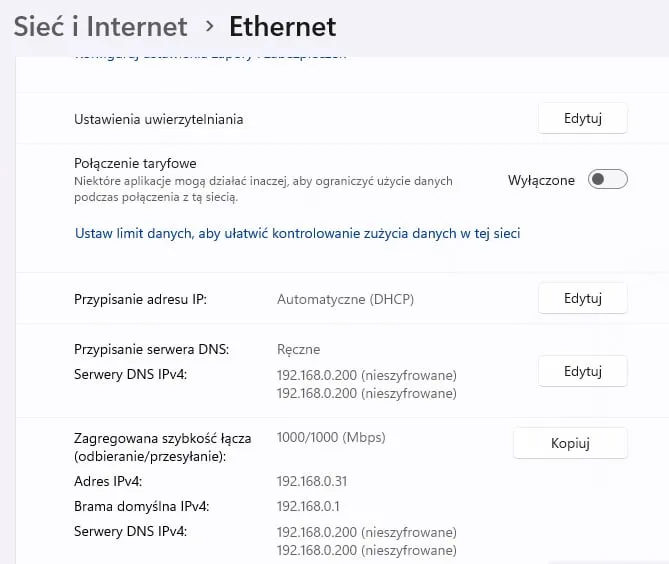
If you don’t want to touch the router yet, you can test AdGuard on a single Windows computer first: Settings → Network & internet → Ethernet (or Wi-Fi) → DNS server assignment → Edit and enter the server’s address.
Step 7: blocklists
AdGuard’s default list is good for a start, but let’s add Polish ones (pick lists for your own country). In the panel go to Filters → DNS blocklists → Add blocklist → Choose from the list and in the regional section tick:
- POL: CERT Polska List of malicious domains: a list of phishing and malicious domains maintained by CERT Polska, Poland’s national CERT. This is what protects your family from fake bank, courier and “pay the parcel fee” sites;
- POL: Polish filters for Pi-hole: Polish ad and tracking domains.
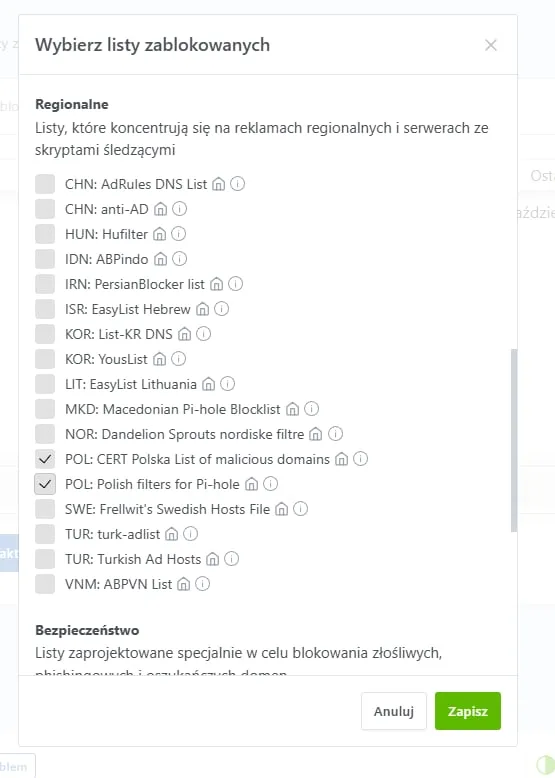
Pick the rest as you see fit. Each list means more blocking, but also a higher chance that something you need stops working. When that happens, the Query log makes it easy to find the culprit domain and add an exception.
The result
I open a site packed with ads, Onet (a big Polish news portal), and the ads are gone. After a few minutes the statistics looked like this:
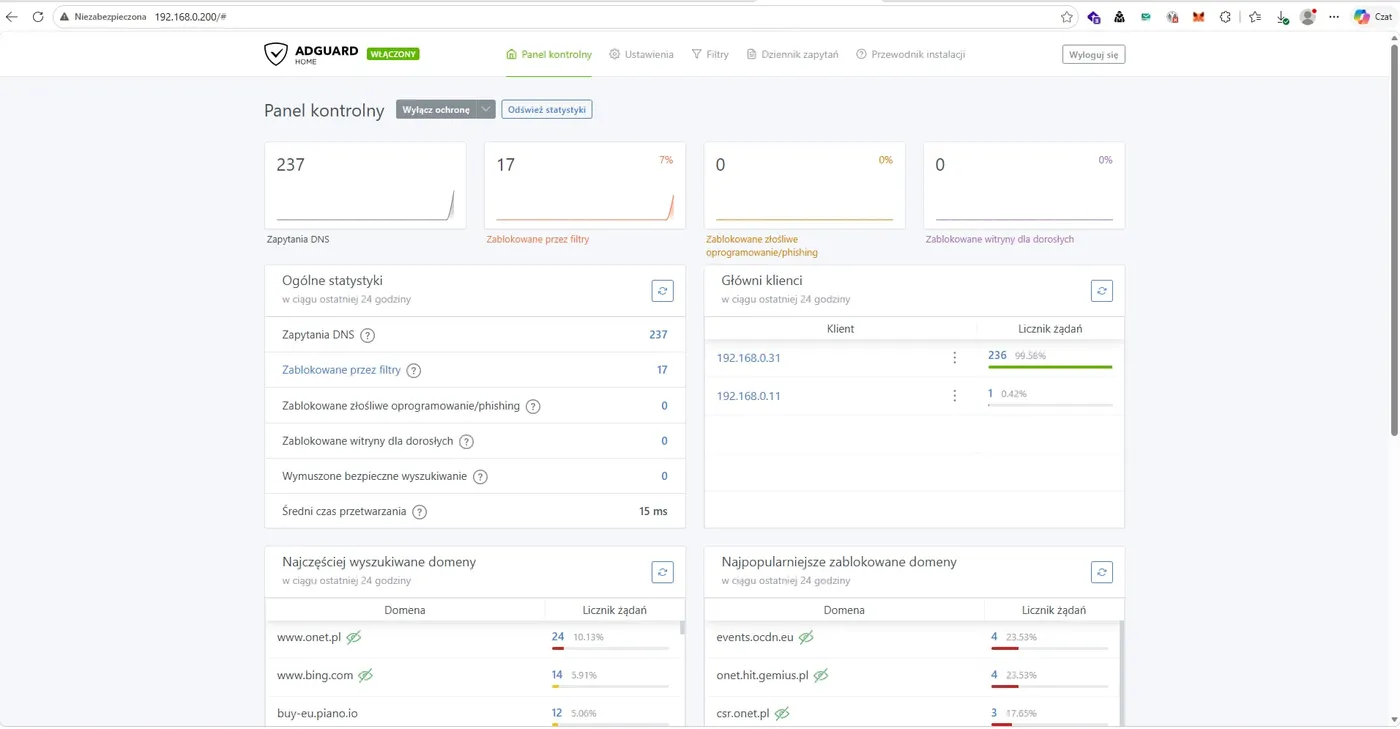
- 237 DNS queries, of which 17 (7%) were blocked, with practically one computer using it;
- the blocked domains include
onet.hit.gemius.pl(analytics and tracking),events.ocdn.euandcsr.onet.pl; - the average response time was 15 ms, so nobody will notice any slowdown.
That’s one device and a few minutes. With a whole house over a whole day, it adds up to a lot.
What’s next
Have a play. There are loads of lists, and the query log is great at showing what your devices do in the background. You might be surprised where your TV phones home.
I also run a Tailscale VPN on top: wherever I am, my phone connects to my home network and its DNS queries go to my AdGuard, so ads are blocked even away from home. In the next post I’ll show how to set that up so you’re protected 24/7. Also on the list: SSH keys instead of passwords, and subnetting.
Remember: if you can, protect the people close to you. Not everyone has the time or the urge to sit at a computer, everyone has different interests. But everyone deserves not to land on a fake bank site.