Homelab from scratch, part 1: Ubuntu Server in a virtual machine
Setting up Ubuntu Server 26.04 LTS in VirtualBox for a home DNS filter: bridged networking, a static IP (with an explanation of where /24 comes from), LVM storage, SSH and the first update. Mistakes included.
Czytaj po polskuMy first AdGuard went up about a year ago on an old HP Z400. Unfortunately that machine’s motherboard died, so I turned my personal computer into a server. Today it runs Fedora 24/7 and hosts “Ubunciak”, an Ubuntu Server virtual machine that runs AdGuard, among other things.
In this series I’ll show you how to set up the same thing at home. The goal is simple: protect the people you care about. Parents, grandparents and younger siblings don’t need to know anything about IT, and they still deserve an internet without junk ads, tracking and sites pretending to be their bank. A DNS filter for the whole home network does that for them, without installing anything on every phone.
- Part 1 (this post): the virtual machine and Ubuntu Server with a static IP and SSH.
- Part 2: Docker, Portainer and AdGuard Home, plus pointing the whole network at it from the router.
VirtualBox or KVM?
At home I mostly use KVM (through libvirt), but for beginners I recommend VirtualBox because it’s really easy to use, and that’s what I took the screenshots in. Moving from VirtualBox to KVM is a bit like switching from a small delivery van to a truck: you get far more options and possibilities. KVM (Kernel-based Virtual Machine) is a hypervisor built into the Linux kernel, so virtual machines run very close to the hardware and performance is only slightly below native. In VirtualBox you can only dream of that.
The installation logic is the same in both. In another post I’ll show how to run a Windows VM on a Fedora host and pass your own graphics card through to it (GPU passthrough) to play games at practically native speed. It makes a huge difference.
Step 1: a new virtual machine
In VirtualBox click New, give the machine a name (mine is “Ubunciak”), pick Linux / Ubuntu (64-bit) and untick unattended installation, because we’ll go through the installer ourselves.
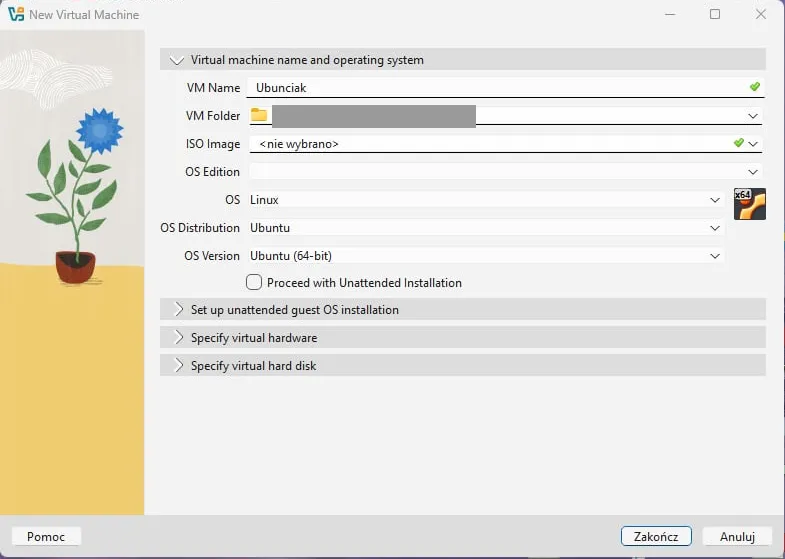
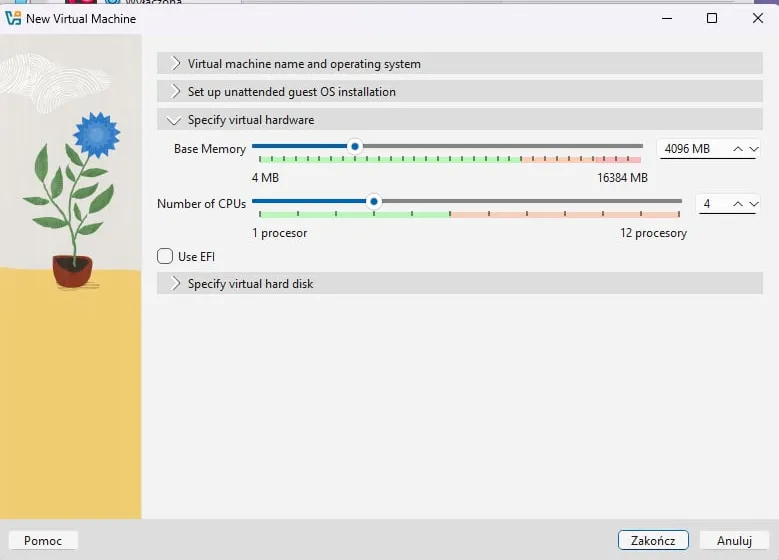
AdGuard itself needs very few resources, but more services will end up on this server over time, so I leave some headroom: 4 GB of RAM, 4 CPUs and a 50 GB disk.
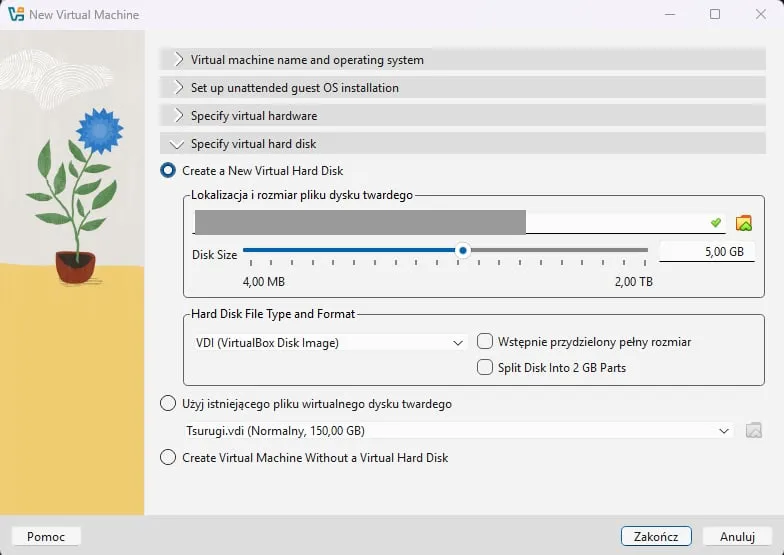
And here’s mistake number one: I missed a zero on the disk size and set 5 GB instead of 50 GB. The installation wouldn’t fit on a disk that small, so I fixed it to 50 GB. It happens, which is why it’s worth checking the summary before clicking “Finish”.
Networking: bridged adapter
This step matters. By default VirtualBox puts the network adapter in NAT mode, where the VM hides behind the host and the rest of the home network can’t see it. A DNS server for the whole house has to be reachable by every device, so in Settings → Network change the mode to Bridged Adapter. The VM then gets its own address on the home network, like any other computer.
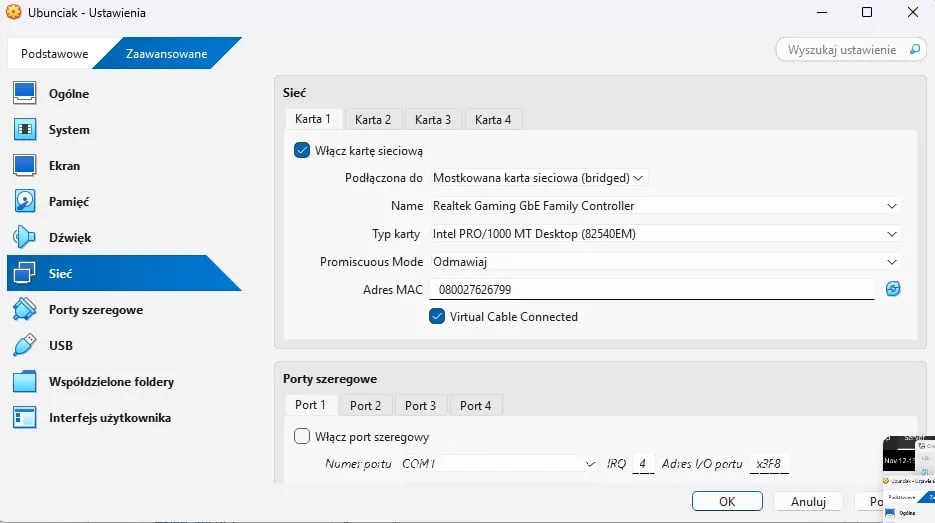
You could also create a separate internal network and guard only that, it’s up to your imagination. In this guide, though, I want to protect the whole home network, so I’m sticking with bridged mode.
Step 2: the ISO and starting the installer
Download Ubuntu Server 26.04.1 LTS from ubuntu.com/download/server. An LTS release gets 5 years of standard support, which is exactly what you want from a server. It’s also a good habit to check the image’s SHA256 checksum against the one Canonical publishes. On Windows:
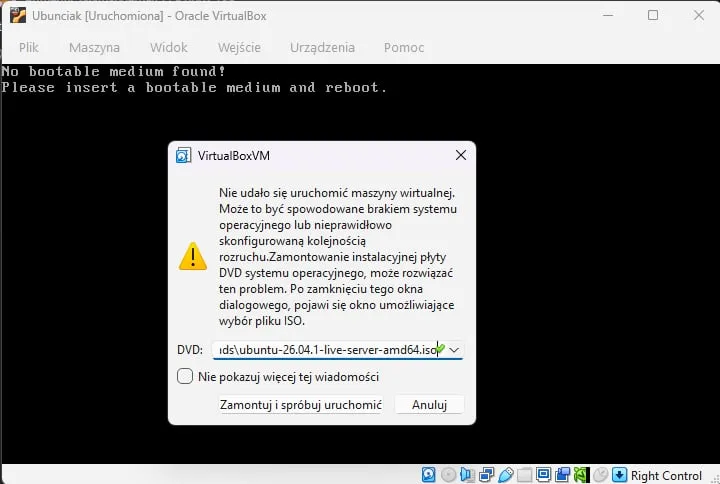
certutil -hashfile ubuntu-26.04.1-live-server-amd64.iso SHA256Start the VM. Since there’s no operating system yet, VirtualBox asks for a disc: point it at the downloaded .iso file and click Mount and Retry Boot.
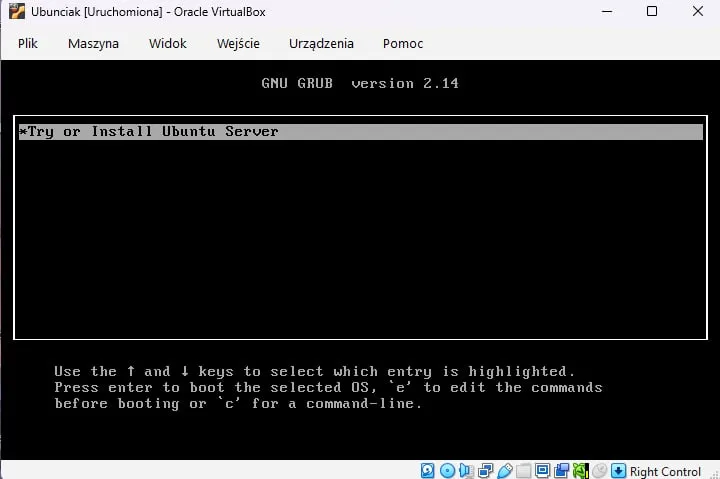
The GRUB menu appears. Mine only has Try or Install Ubuntu Server, so I press Enter.
Step 3: the installer
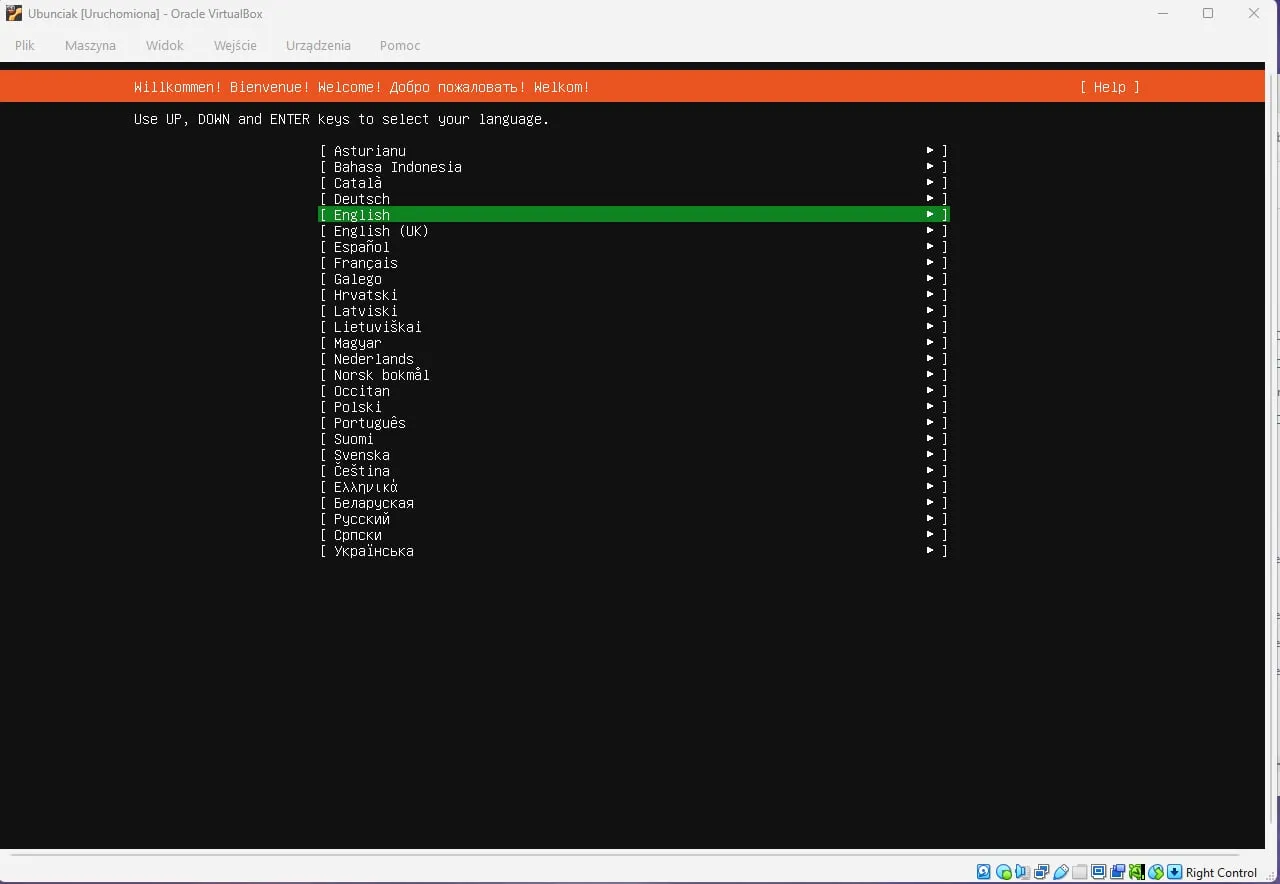
Now a quick click through the wizard. I pick English as the language because I’m comfortable with it and it’s easier to search for error messages online later. You can choose whatever you like. I set the keyboard layout to Polish out of habit. What matters is that it matches your actual keyboard. For the installation type, leave plain Ubuntu Server and choose Done.
Network and a static IP address
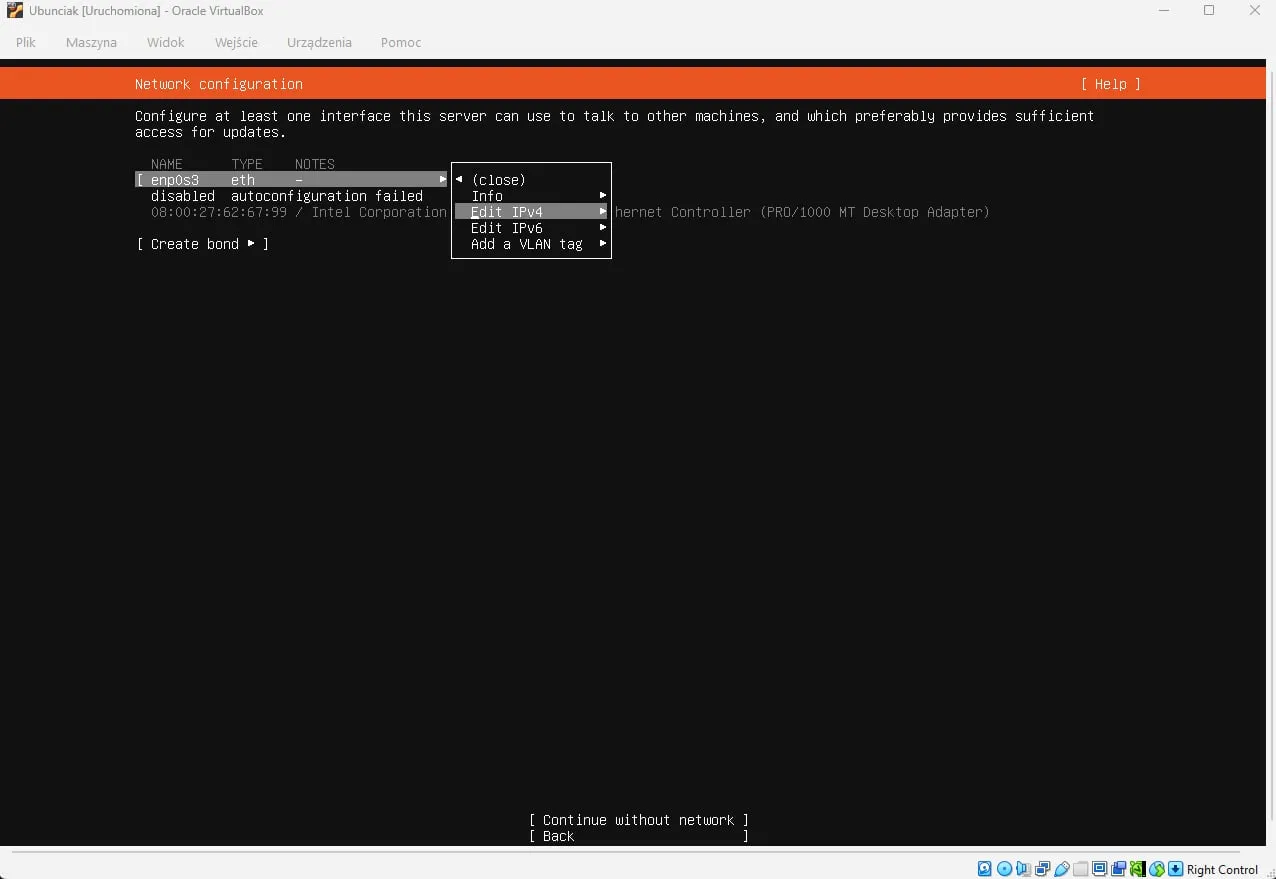
Mistake number two: I bridged the adapter to my laptop’s Ethernet port and didn’t even plug the cable in. So the installer showed autoconfiguration failed. No worries, we’re setting the address by hand anyway. A DNS server needs a fixed address, otherwise the router will eventually give it a different one and the whole house loses internet.
Select the enp0s3 interface and press Enter. An unordered list pops out (a little <ul> joke for anyone who has done web development), and we pick Edit IPv4.
Change IPv4 Method to Manual and enter your network’s addressing:
| Field | Mine | What it is |
|---|---|---|
| Subnet | 192.168.0.0/24 |
the whole home network with its mask |
| Address | 192.168.0.200 |
the address the server will get |
| Gateway | 192.168.0.1 |
the router’s address |
| Name servers | 1.1.1.1 |
DNS during installation (Cloudflare), we’ll change it later |
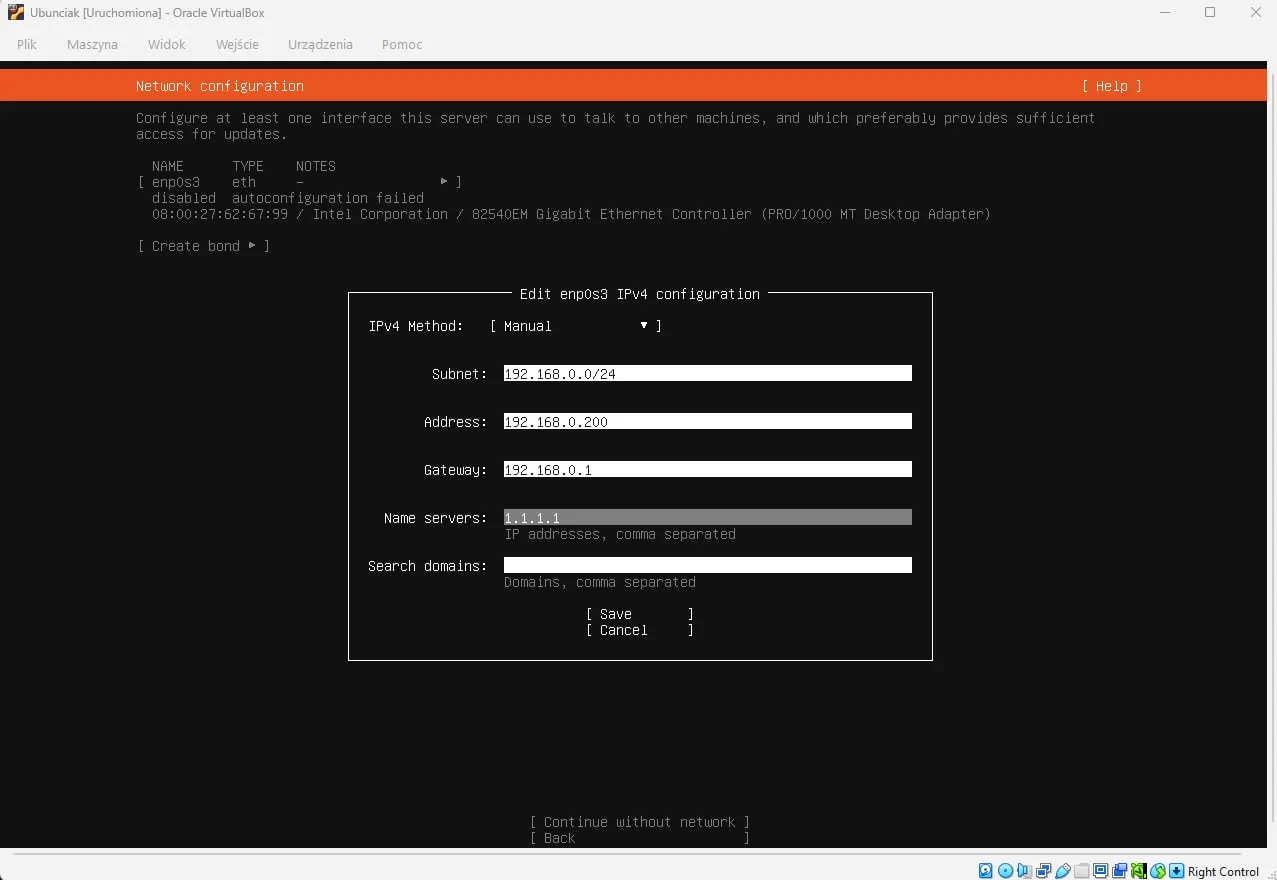
Pick a server address outside the router’s DHCP pool (you’ll see the range in the router’s DHCP settings, e.g. .100–.199) or reserve it in the router. If the router hands the same address to another device, you’ll get a conflict.
Where these numbers come from and what /24 means
On Windows, run ipconfig in a terminal and find the adapter you’re connected through. Two lines matter:
Subnet Mask . . . . . . . . . . . : 255.255.255.0
Default Gateway . . . . . . . . . : 192.168.0.1
The default gateway is usually your router’s address. An IPv4 address has four octets separated by dots, and each octet is 8 bits, a number from 0 to 255. The mask says which part of the address identifies the network and which part identifies a specific device:
255in the mask means the whole octet belongs to the network address. In my case the first three octets,192.168.0, are shared by every device at home;0at the end means the fourth octet is free to hand out to devices (hosts).
/24 is the same mask counted in bits: 3 octets × 8 bits = 24 bits for the network. That leaves 8 bits for hosts, so 2⁸ = 256 addresses. Two are reserved: 192.168.0.0 is the address of the network itself, and 192.168.0.255 is the broadcast address, used to send a message to every device on the network at once. That leaves 254 addresses for devices, from .1 to .254.
Your network may look different. There are three private address ranges (the old classes A, B and C). They work the same way, only the numbers differ:
10.0.0.0/8, e.g. router at10.0.0.1;172.16.0.0/12, e.g. router at172.16.0.1;192.168.0.0/16, most often192.168.0.xor192.168.1.xat home.
/24 is the simplest network there is. Some day I’ll write a separate post on subnetting, because imagine what happens with a /12 mask ;)
After saving, the installer accepted the address. That’s when I finally noticed and plugged the cable in, so we have an internet connection too.
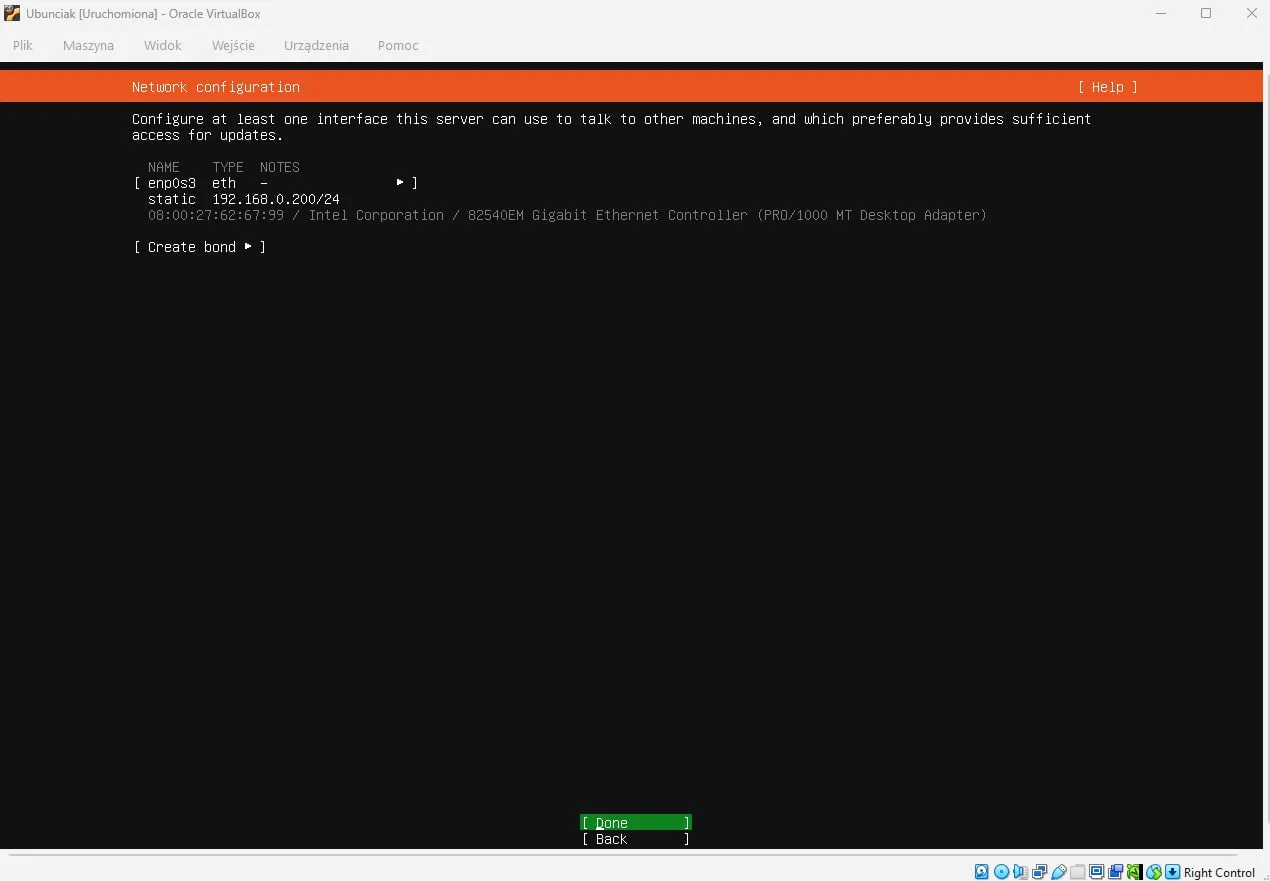
Next comes Proxy configuration. Leave it alone and choose Done. Wait for the installer to check the package mirror, then Done again.
Storage: LVM, encryption and a size trap
Leave Use an entire disk and Set up this disk as an LVM group. On a real server it’s worth ticking Encrypt the LVM group with LUKS too: if someone steals the disk, they can’t read anything without the passphrase. I’m not doing it here because this VM is going in the bin right after the guide. On my main computer, the one running Fedora, the disk is encrypted, with VeraCrypt no less. If you know, you know why. I keep the default ext4 file system. With a custom storage layout you can pick something like btrfs.
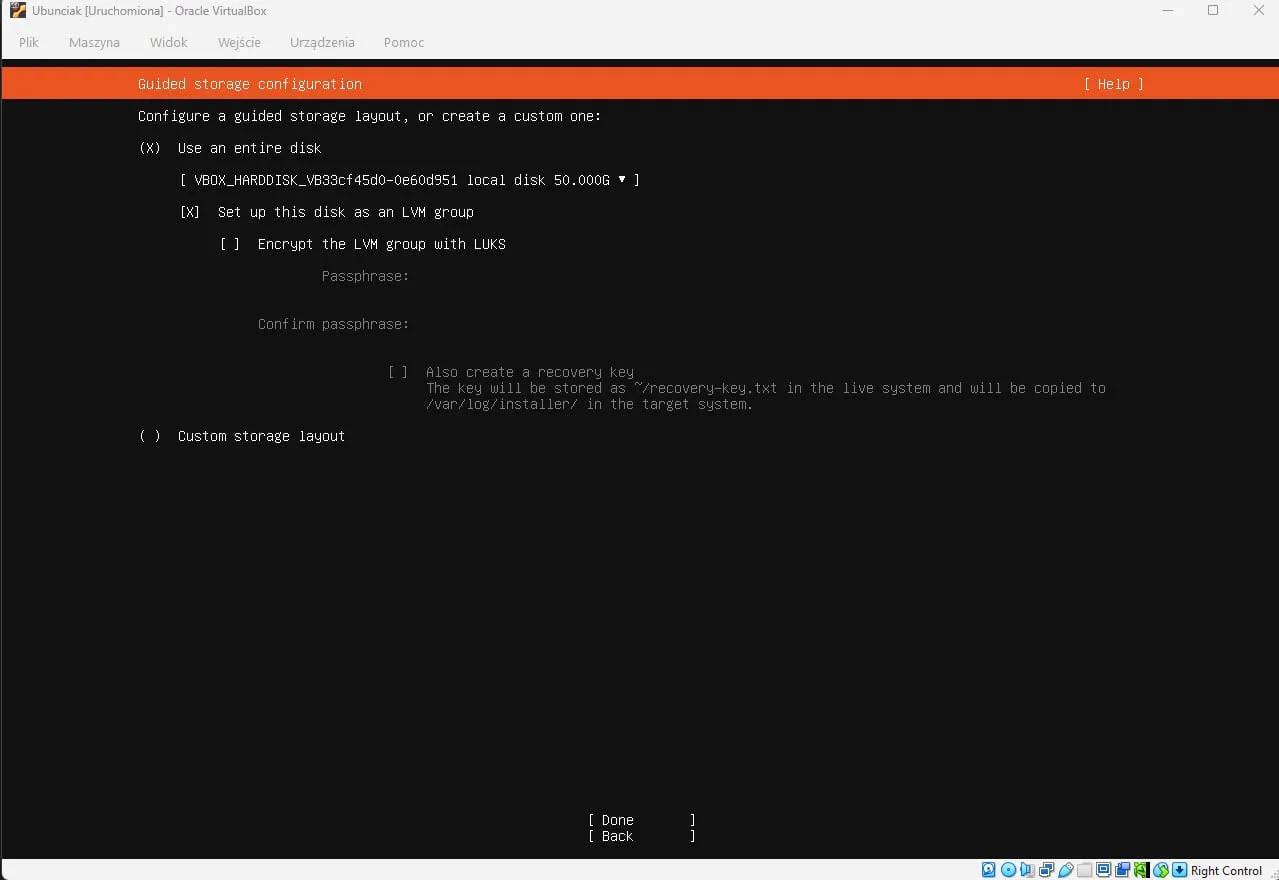
Now look closely at the summary. The LVM group is 48 GB, but the root partition / only got 24 GB, and the other half is left as free space. By default the Ubuntu installer doesn’t use the whole group, so there’s room left for later.
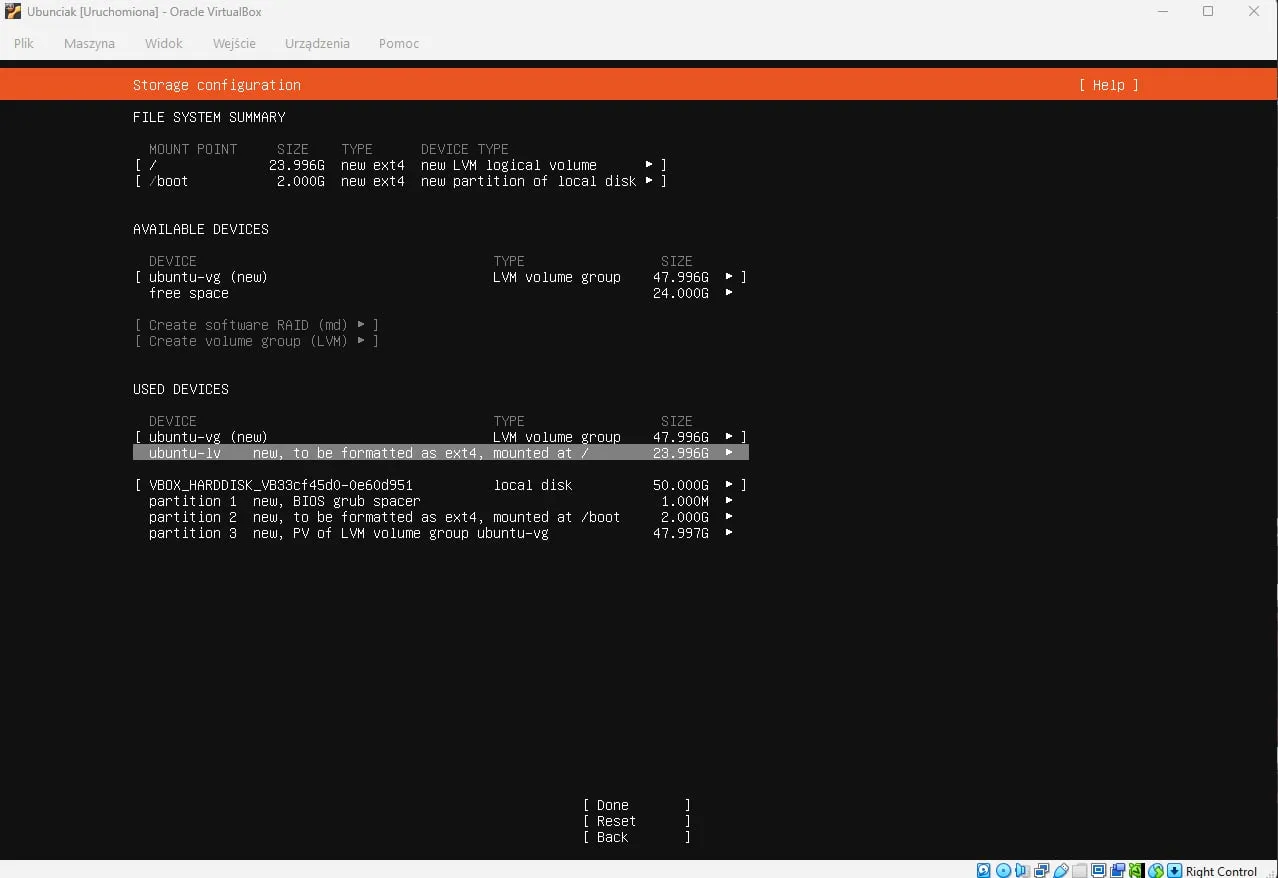
24 GB is more than enough for a DNS server, but it’s worth knowing. You can edit ubuntu-lv right away and give it the full size, or grow it later with one command and no reinstall:
sudo lvextend -r -l +100%FREE /dev/ubuntu-vg/ubuntu-lvChoose Done and confirm with Continue. The installer warns that everything on the disk will be erased, but it’s a virtual disk, so we lose nothing.
Profile, Ubuntu Pro and SSH
In the profile, enter your name, the server name (mine is madej), a username and a proper password. You’ll use it to log in and for sudo.
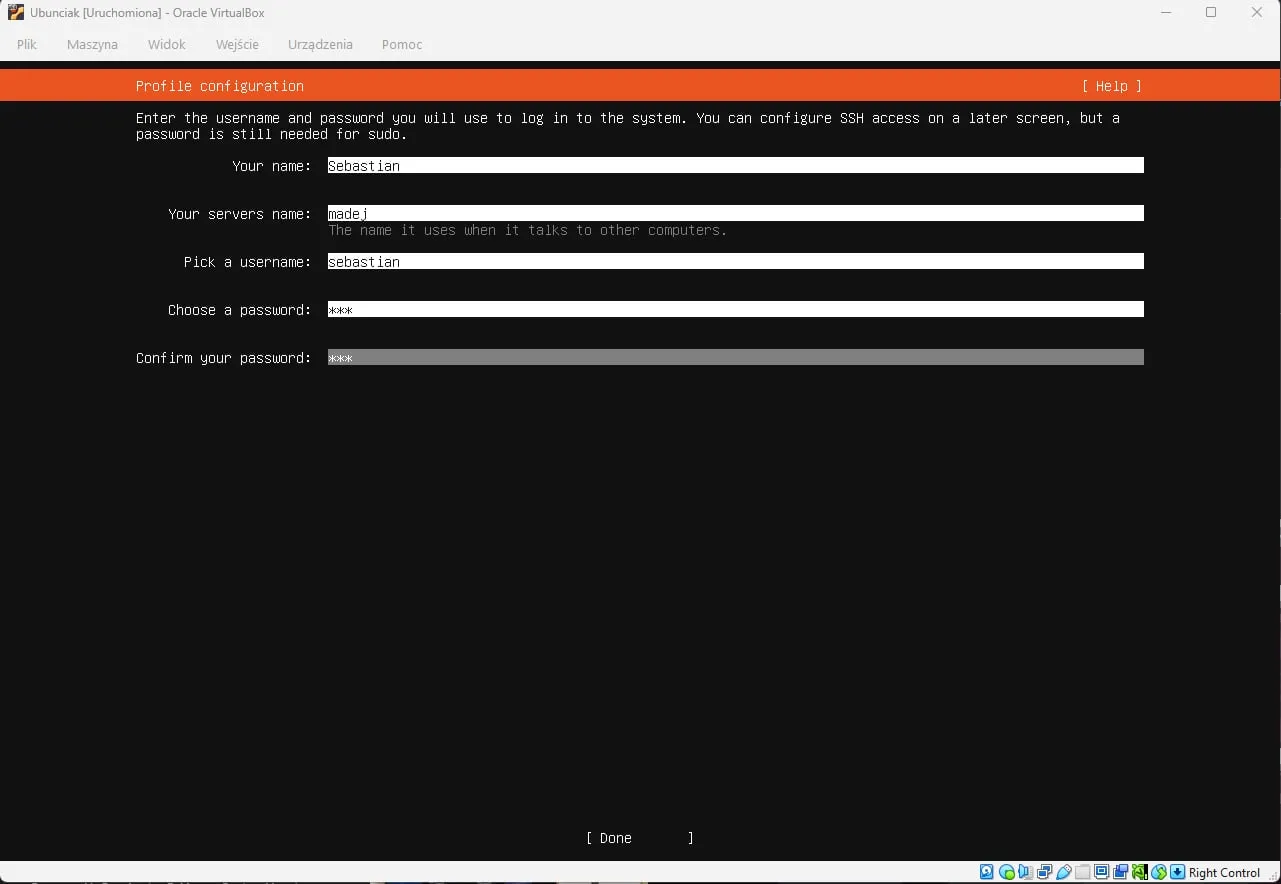
Skip Upgrade to Ubuntu Pro (Skip for now, then Continue). You can turn it on later.
Then tick Install OpenSSH server. SSH is a remote terminal, and a server is not much fun without it. I sit in my chair and connect from my laptop only when I need to. Without it I’d have to walk to the server every time, change something, walk back to the laptop to check it works, and repeat. Quite the cardio.
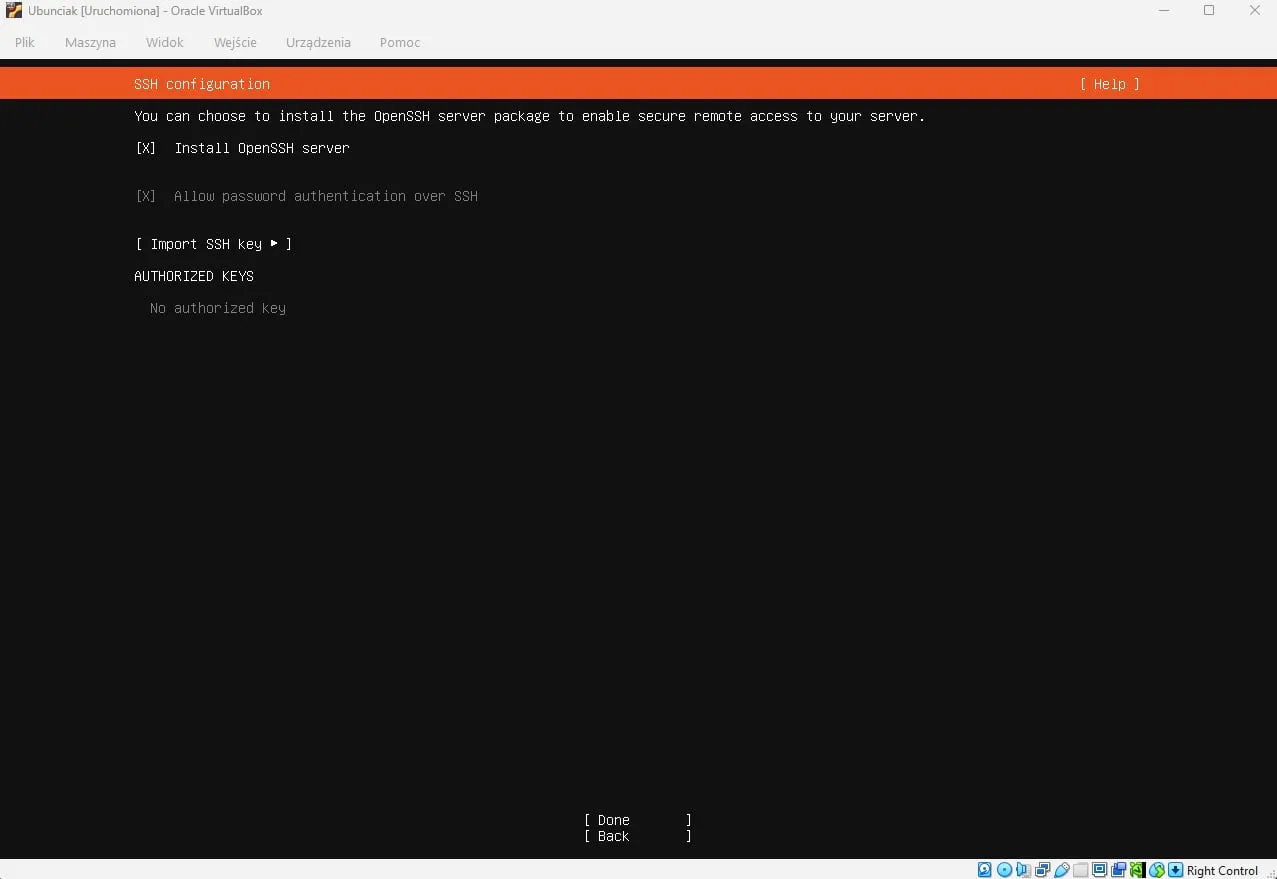
For now I leave password login on, because the point is to get your home traffic protected quickly. SSH keys are much better than passwords and I’ll cover them in a separate post. Don’t install any of the featured server snaps, choose Done and the installation starts. When it finishes, click Reboot Now.
Step 4: first SSH login
After the VM restarts, I open a terminal on my laptop and type the scary command:
ssh sebastian@192.168.0.200For you it’s ssh [username]@[server_address]. On the first connection SSH asks whether you trust the server and shows its key fingerprint. Answer yes. The client remembers that key, and if it ever changes, SSH warns that someone may be impersonating the server. On a home network it’s fine to trust it, but if you want to be thorough, compare the fingerprint with what the server itself reports:
ssh-keygen -lf /etc/ssh/ssh_host_ed25519_key.pubType the password and ta-da, welcome to my realm.
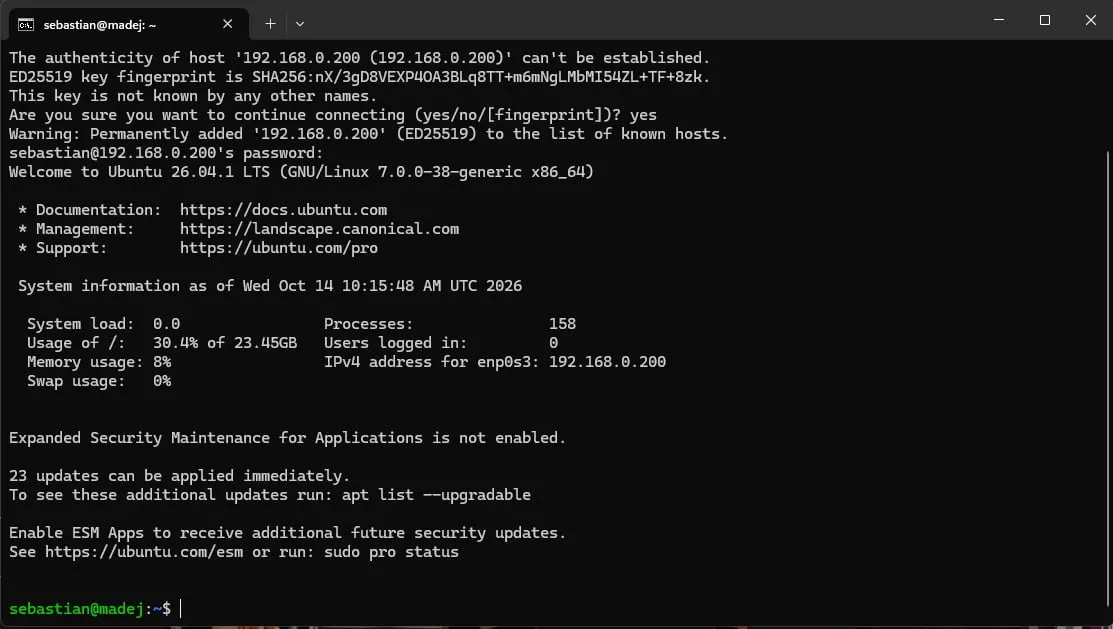
Step 5: updates
As always, the first thing is to update the beast. An ISO image is never the latest, and new security patches have come out since it was released (the system immediately says 23 updates are waiting):
sudo apt update && sudo apt upgrade -yapt update fetches the list of available versions, and apt upgrade -y installs the updates without asking. A green progress bar runs, and we wait.
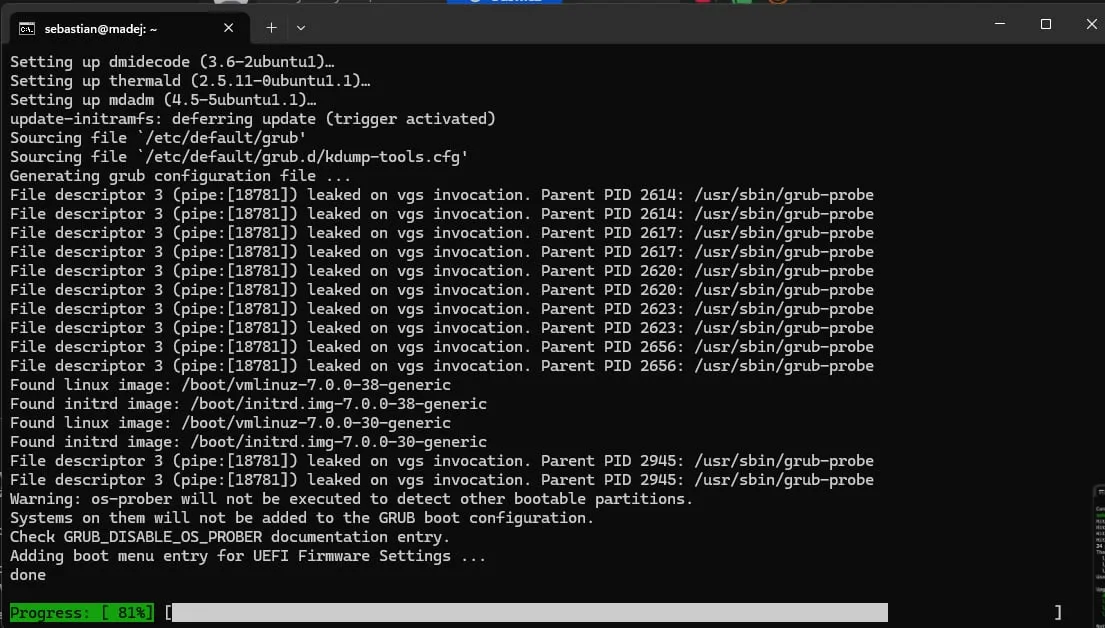
The File descriptor ... leaked on vgs invocation lines look scary, but they’re just warnings from the LVM tools while the GRUB configuration is generated. You can ignore them.
What we have
A working Ubuntu Server with a static address on the home network, fully updated and reachable over SSH. That’s the foundation for part 2, where we install Docker, Portainer and AdGuard Home, and then switch the whole house’s DNS over to it.
My mistakes in this part: 5 GB instead of 50 GB, and an unplugged cable. Both fixed in a minute. Nothing to worry about, you just have to read what you’re clicking.